Astro Cloud IDE quickstart
The Cloud IDE is currently in Public Preview and it is available to all Astro customers. It is still in development and features and functionality are subject to change.
If you have any feedback, please submit it to the Astro Cloud IDE product portal.
Use this quickstart to create and run your first project with the Cloud IDE.
Time to complete
This quickstart takes approximately 30 minutes to complete.
Prerequisites
To complete this quickstart, you need:
Workspace Editor permissions in an Astro Workspace.
Optional. A database hosted in one of the following services:
- GCP BigQuery
- Postgres (hosted)
- Snowflake
- AWS S3
- Redshift
If you don't provide a database, you can still complete the quickstart. However, you won't be able to test SQL code in your pipeline.
Step 1: Log in and create a project
The Cloud IDE is available to all Astro customers and can be accessed in the Cloud UI.
- Log in to the Cloud UI and select a Workspace.
- Click Cloud IDE in the left menu. If you are the first person in your Workspace to use the Astro Cloud IDE, the My Projects page is empty.

- Click + Project, enter a name and a description for the project, and then click Create.
After you create your project, the Cloud IDE opens your project home page with the following tabs:
- The Pipelines tab stores all of the Python and SQL code that your project executes.
- The Connections tab stores Airflow connections for connecting your project to external services.
- The Variables tab stores Airflow variables used in your pipeline code.
- The Requirements tab stores the required Python and OS-level dependencies for running your pipelines.
Step 2: Create a pipeline
Click the Pipelines tab and then click + Pipeline.
Enter a name and a description for the pipeline and then click Create.
When you first run your project, your pipeline is built into a single DAG with the name you provide. Because of this, pipeline names must be unique within their project. They must also be a Python identifier, so they can't contain spaces or special characters.
After clicking Create, the IDE opens the pipeline editor. This is where you'll write your pipeline code.
Step 3: Create a Python cell
Cells are the building blocks for pipelines. Cells can be created with either Python or SQL code. For this quickstart, you'll write a Python cell named hello_world.
In the Pipeline list, click the name of the pipeline you created in step 2.
Click Add Cell and select Python. A new cell named
cell_1appears.Click the cell's name and rename the cell
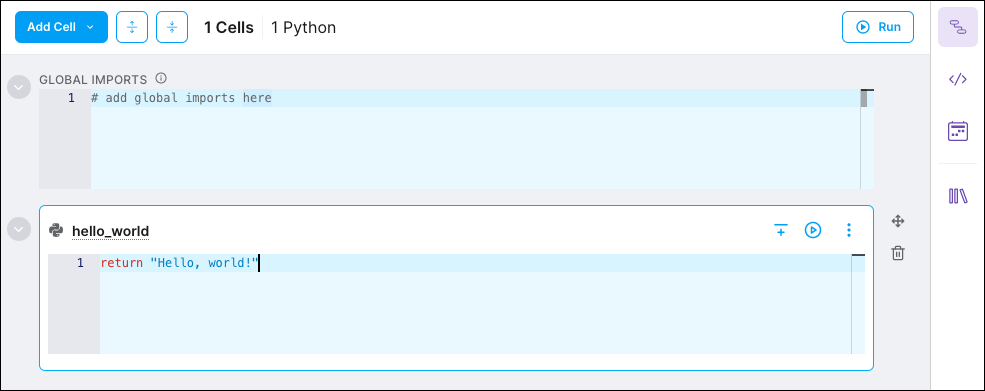
hello_world.Click the editing window where it says
# Write your code here…, then replace that line with the following code:return "Hello, world!"
Your pipeline editor should look like the following:
Step 4: Run your cell
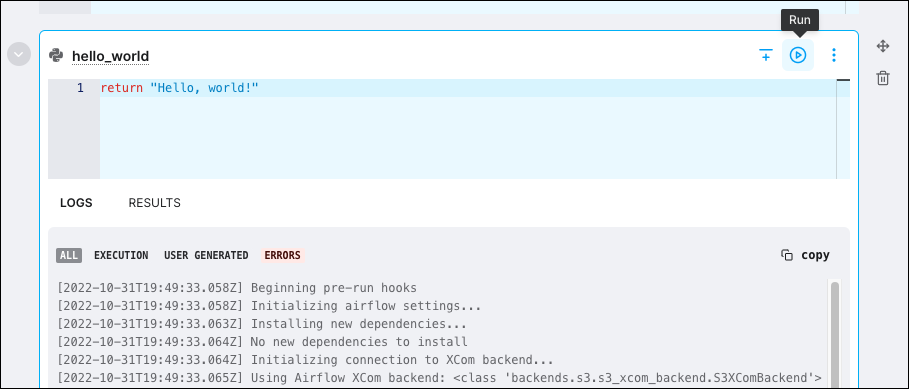
In the hello_world cell, click Run to execute a single run of your cell.
When you run a cell, the Cloud IDE sends a request to an isolated worker in the Astronomer-managed control plane. The worker executes your cell and returns the results to the Cloud IDE. Executing cells in the Cloud IDE is offered free of charge. For more information on execution, see Execution.
The Logs tab contains all logs generated by the cell run, including Airflow logs and Python errors. The Results tab contains the contents of your Python console. Click Results to view the result of your successful cell run.
Step 5: Create a database connection
To create a SQL cell and execute SQL, first create a database to run your SQL queries against.
Click the Connections tab and then click Connection.

Click NEW CONNECTION.
Choose one of the available connection types and configure all required values for the connection. Click More options to configure optional values for the connection.
infoSQL cell query results are stored as temporary tables in the database you're querying. The schema field in your connection object determines where these end up. Astronomer recommends setting this field to
TMP_ASTROfor easy cleanup.Optional. Click Test Connection. The Astro Cloud IDE runs a quick connection test and returns a status message. You can still create the connection if the test is unsuccessful.
Click Create Connection. You new connection appears in the Connections tab both in the pipeline editor and on your project homepage. You can use this connection with any future pipelines you create in this project.
Step 6: Create a SQL cell
You can now write and run SQL cells with your database connection.
In the Pipeline list, click the name of the pipeline you created in step 2.
Click Add Cell and select SQL. A new cell named
cell_1appears.Click the cell name and rename it
hello_sql.In the Select Connection list, select the connection you created in step 5.
Replace
-- Write your SQL query herewith the following code:SELECT 1 AS hello_world;tipYou can also add a SQL cell with a specific connection by clicking the + button from the Connections tab in the Environment menu.
Optional. Click Run to test the SQL query. The results of your query appear in the Results tab.
Step 7: Create dependencies between cells
You now have a Python cell and a SQL cell, but there's no logic to determine which task runs first in your DAG. You can create dependencies for these cells directly in the Astro Cloud IDE.
In the
hello_sqlcell, click Dependencies and then selecthello_world.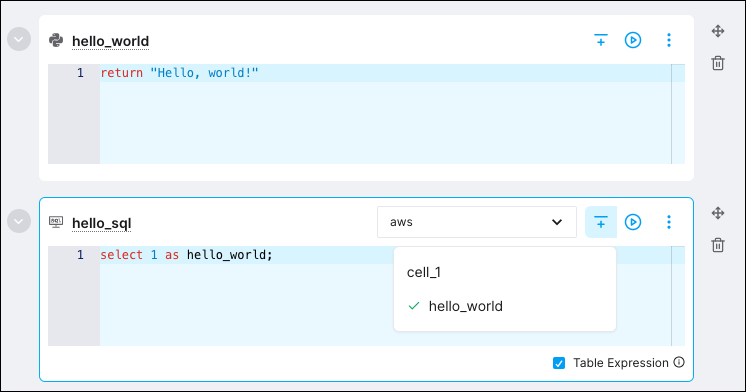
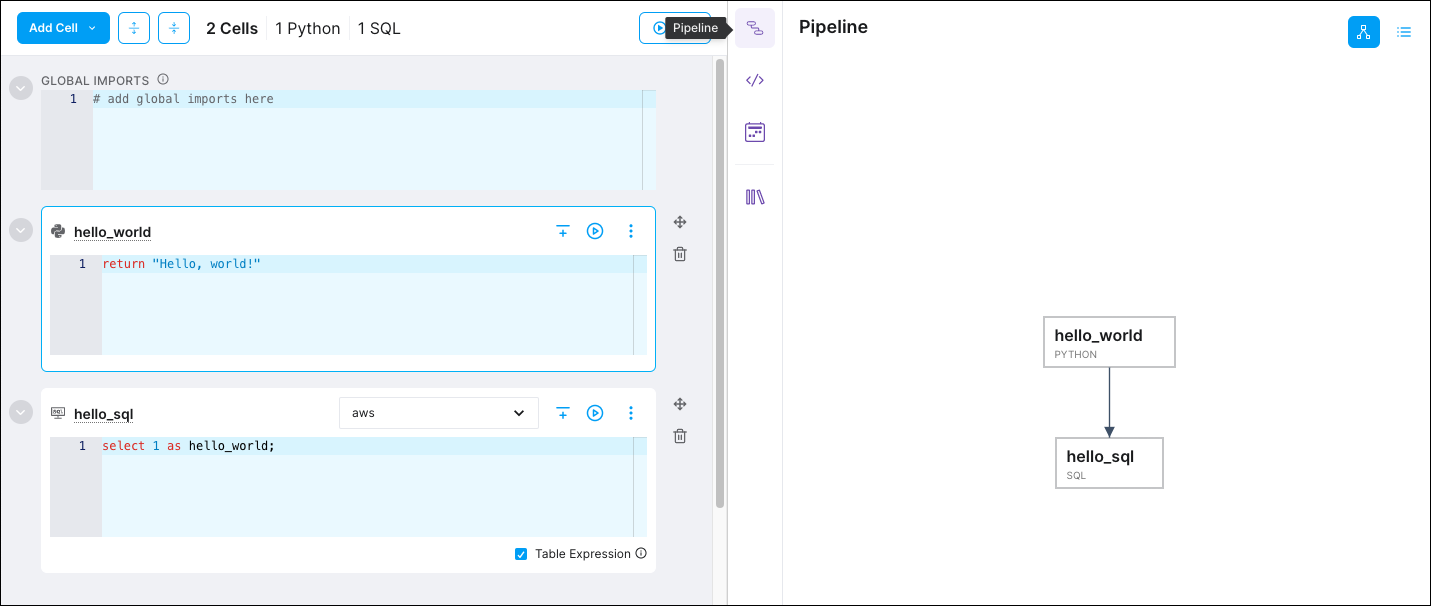
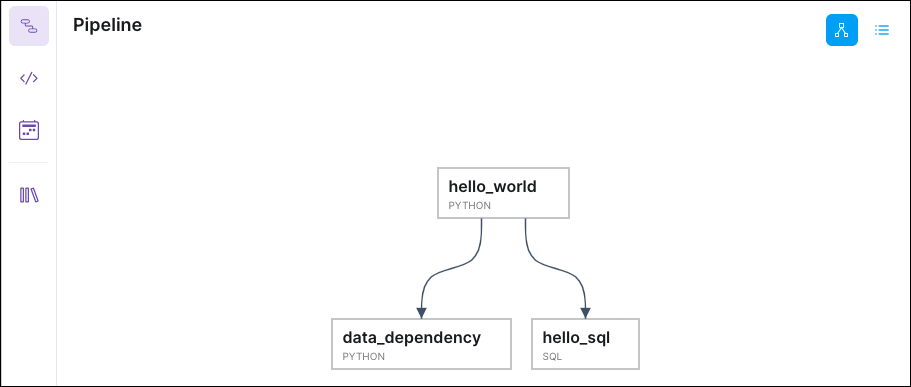
To confirm that the dependency was established, click Pipeline. The Pipeline view shows the dependencies between your cells.
Step 8: Make data references in your code
One of the most powerful features of the Astro Cloud IDE is that it can automatically detect data dependencies in your cell code and restructure your pipeline based on those dependencies. This works for both Python and SQL cells.
To create a potential dependency to a Python cell, the upstream Python cell must end with a return statement. This means that you can create a downstream dependency from hello_world.
Create a new Python cell named
data_dependency.Add the following code to the cell:
my_string = hello_world
return my_string
You can pass any value from a
returnstatement into a downstream Python cell by calling the name of the upstream Python cell.Click Pipeline to confirm that your dependency graph was updated:
You can generate dependencies between any two types of cells.
Use the results of a SQL cell in a SQL cell
You can make a SQL cell downstream dependent of a SQL cell as long as the upstream SQL cell includes a SELECT statement. To do so, reference the name of the SQL cell in your SQL cell using double curly braces, also known as jinja templating.
The following cell is downstream of a SQL cell named my_table.
select * from {{my_table}} -- my_table is another SQL cell
Use the results of a SQL cell in a Python cell
You can make a Python cell downstream dependent of a SQL cell as long as the SQL cell includes a SELECT statement. To do so, create a variable in the Python cell that points to the name of the SQL cell. SQL tables are automatically converted to pandas DataFrames for use in Python cells.
The following Python cell is downstream of a SQL cell named my_sql_cell.
df = my_sql_cell # my_sql_cell is a SQL cell which gets converted to a pandas DataFrame by default
df['col_a'] = df['col_a'] + 1
return df
Use the results of a Python cell in a SQL cell
You can make a SQL cell downstream dependent of a Python cell as long as the Python cell returns a pandas DataFrame. To do so, reference the name of the Python cell in your SQL cell using double curly braces, also known as jinja templating. Pandas DataFrames are automatically converted to SQL tables for use in SQL cells.
The following SQL cell is downstream of a Python cell named my_dataframe.
select * from {{my_dataframe}} -- my_dataframe is a Python cell
where col_a > 10
Step 9: Run your pipeline
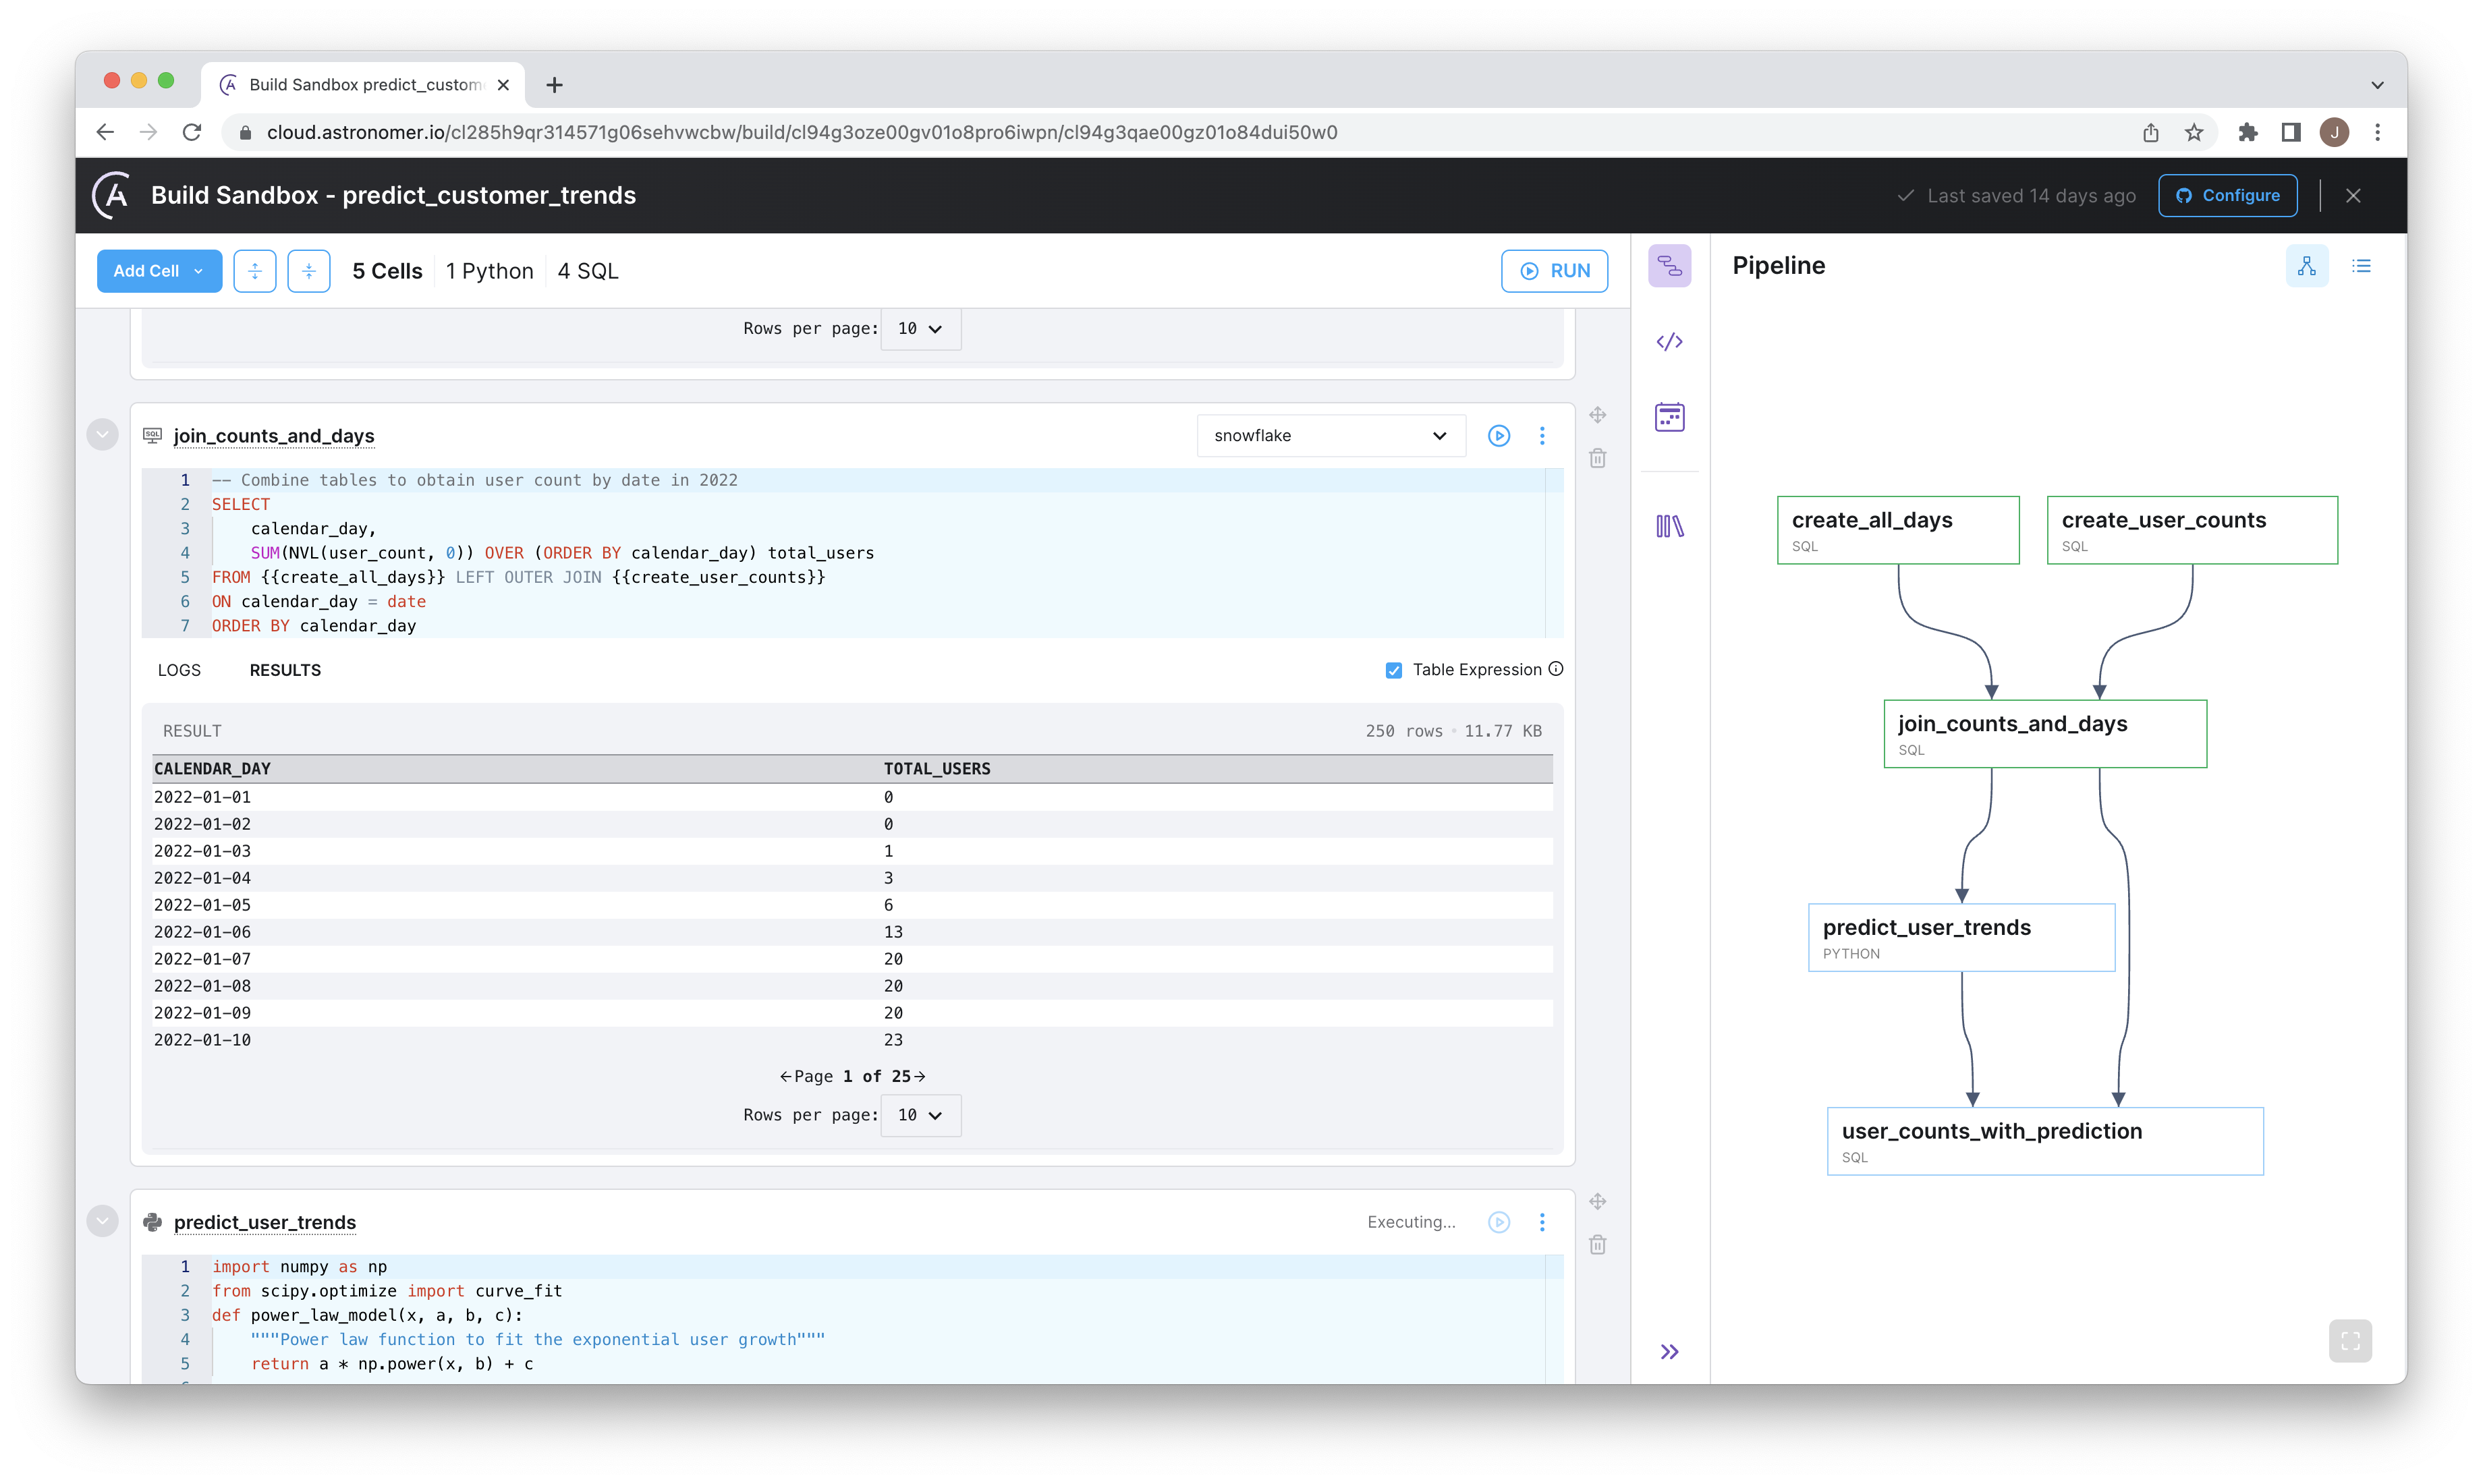
Now that you've completed your pipeline, click Run in the top right corner of your pipeline editing window to run it from beginning to end. Cells are executed in order based on their dependencies. During the run, the Pipeline page shows which cells have been executed and which are still pending.
Step 10: Schedule your pipeline
After you've verified that your pipeline is working, you can schedule it to run regularly.
To set your pipeline's schedule, click Schedule.
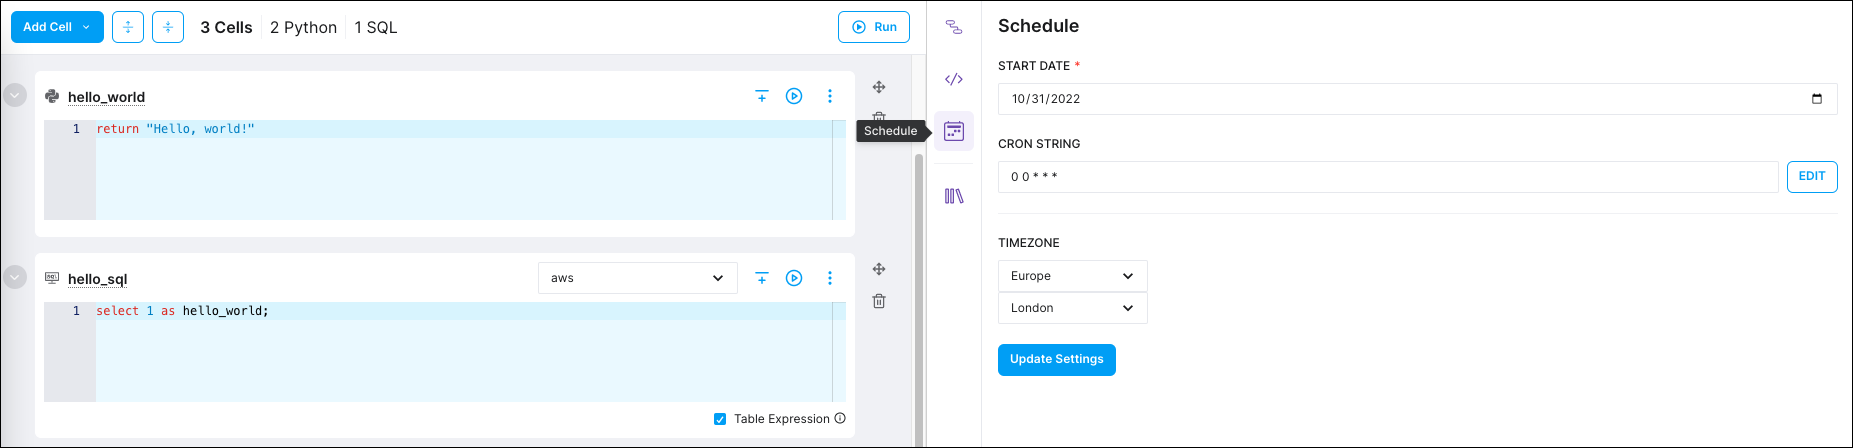
Manually enter a cron string, or click EDIT to open the cron builder, which is a simple UI for setting a cron schedule.
Make your selections and close the cron builder, the Astro Cloud IDE loads a newly generated cron schedule.
Click Update Settings to save your changes.
Configuring your pipeline's schedule will not automatically run it on a scheduled basis. You must deploy your pipeline for it to run. See Deploy a project for setup steps.