Debug DAGs
This guide provides information that will help you resolve common Airflow DAG issues. If you're new to Airflow, you should review the Intro To Data Orchestration With Airflow webinar.
This guide focuses on Airflow 2.0 and later. For older Airflow versions, the debugging steps might be different.
Assumed knowledge
To get the most out of this guide, you should have an understanding of:
- Basic Airflow concepts. See Introduction to Apache Airflow.
DAGs don't appear in the Airflow UI
If a DAG isn't appearing in the Airflow UI, it's typically because Airflow is unable to parse the DAG. If this is the case, you'll see an Import Error in the Airflow UI.
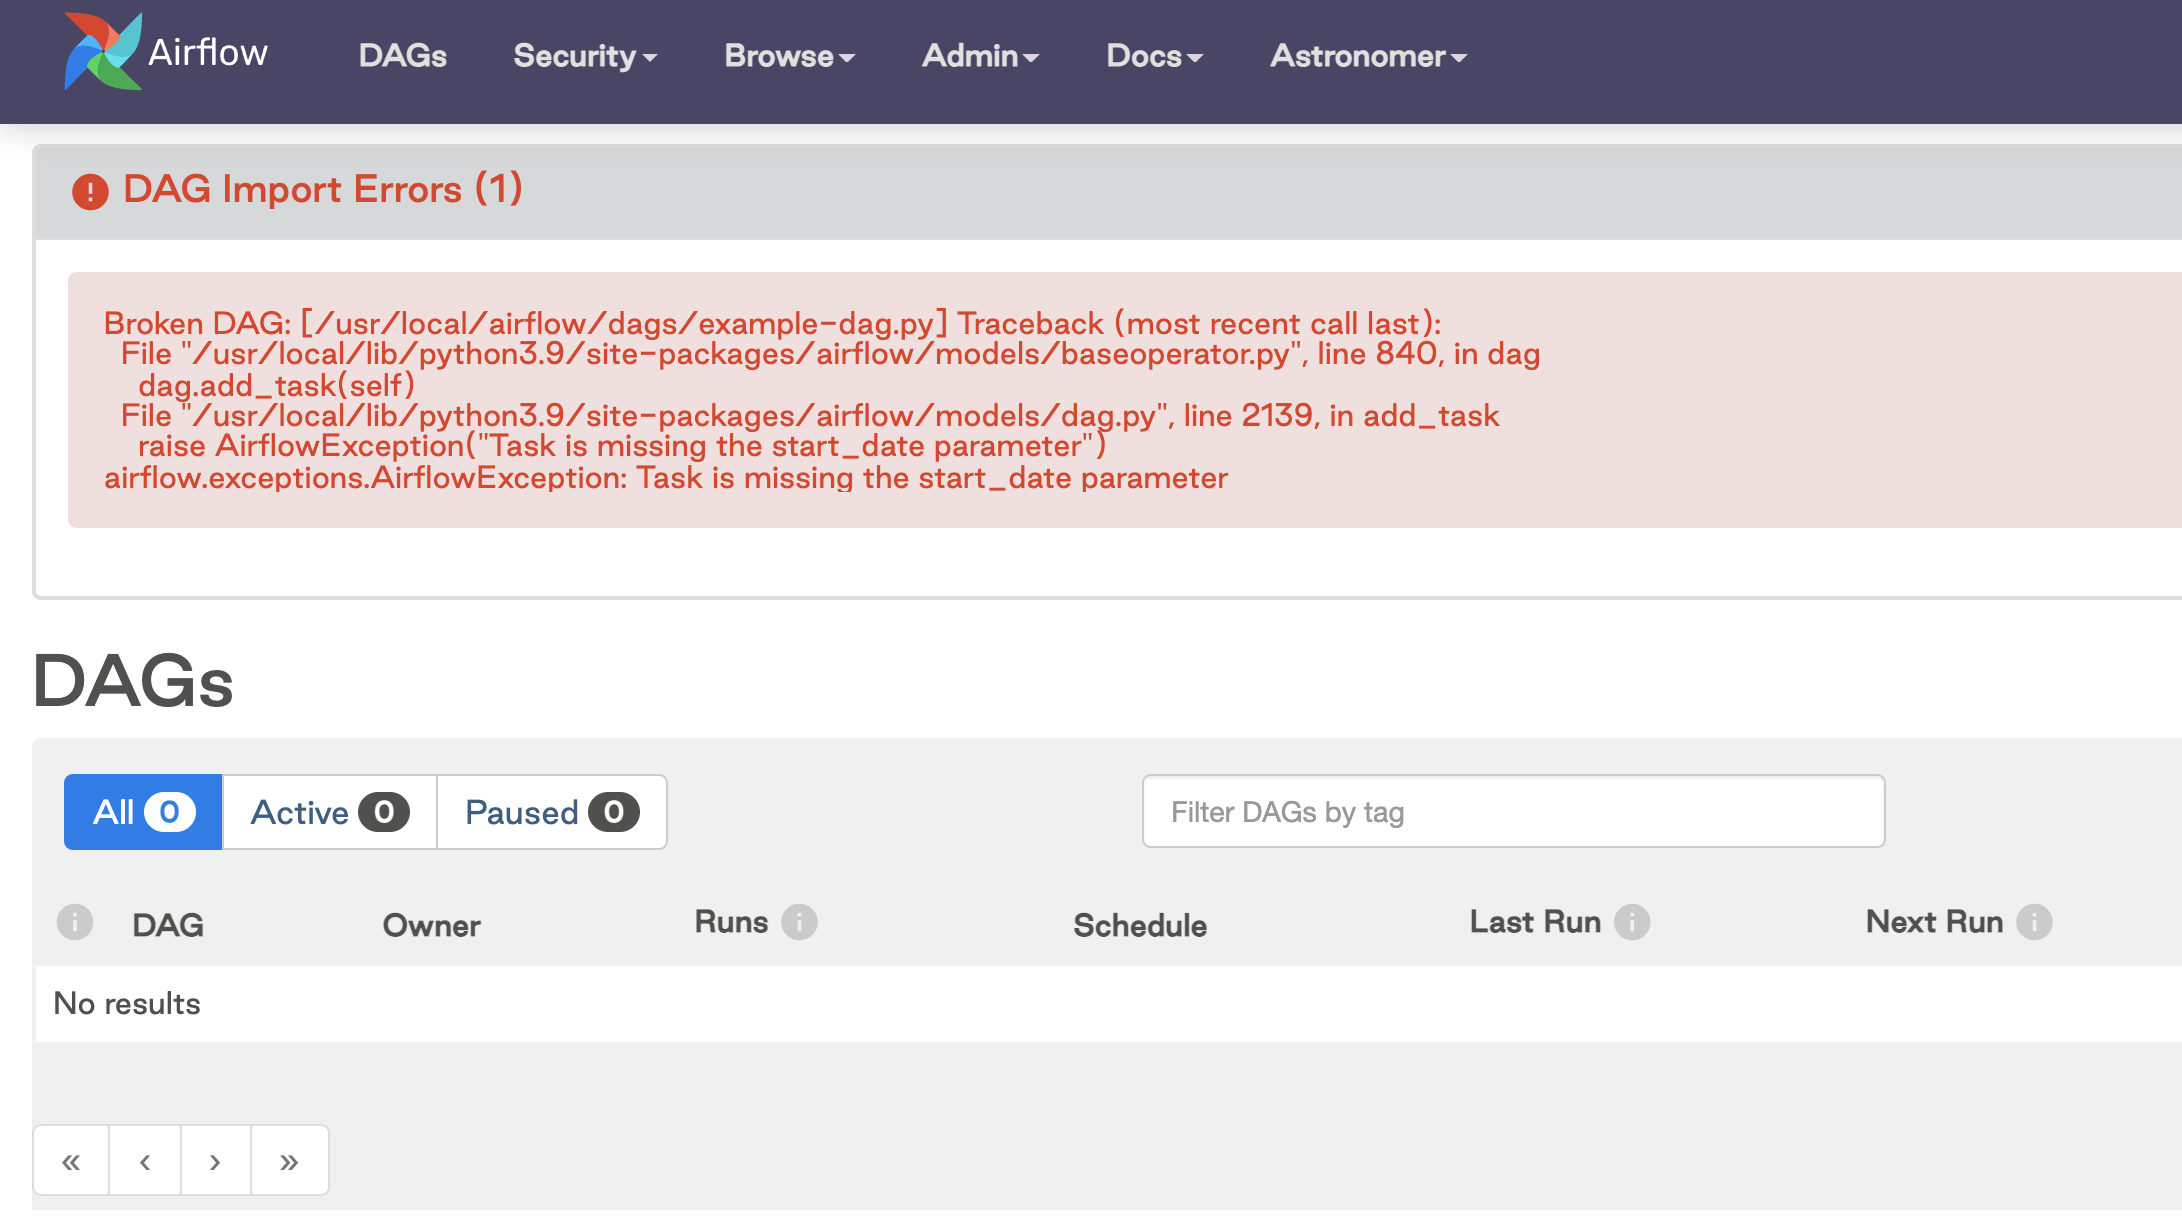
This error message should help you troubleshoot and resolve the issue.
If you don't see an import error message, here are some debugging steps you can try:
Airflow scans the
dags_folderfor new DAGs everydag_dir_list_interval, which defaults to 5 minutes but can be modified. You might have to wait until this interval has passed before a new DAG appears in the Airflow UI.Ensure that you have permission to see the DAGs, and that the permissions on the DAG file are correct.
Run
airflow dags listwith the Airflow CLI to make sure that Airflow has registered the DAG in the metastore. If the DAG appears in the list, try restarting the webserver.Try restarting the scheduler. If you're using the Astro CLI, run
astro dev restart.If you see an error similar to the following image indicating that the scheduler is not running, check the scheduler logs to see if something in the DAG file is causing the scheduler to crash. If you are using the Astro CLI, run
astro dev logs --schedulerand then try restarting.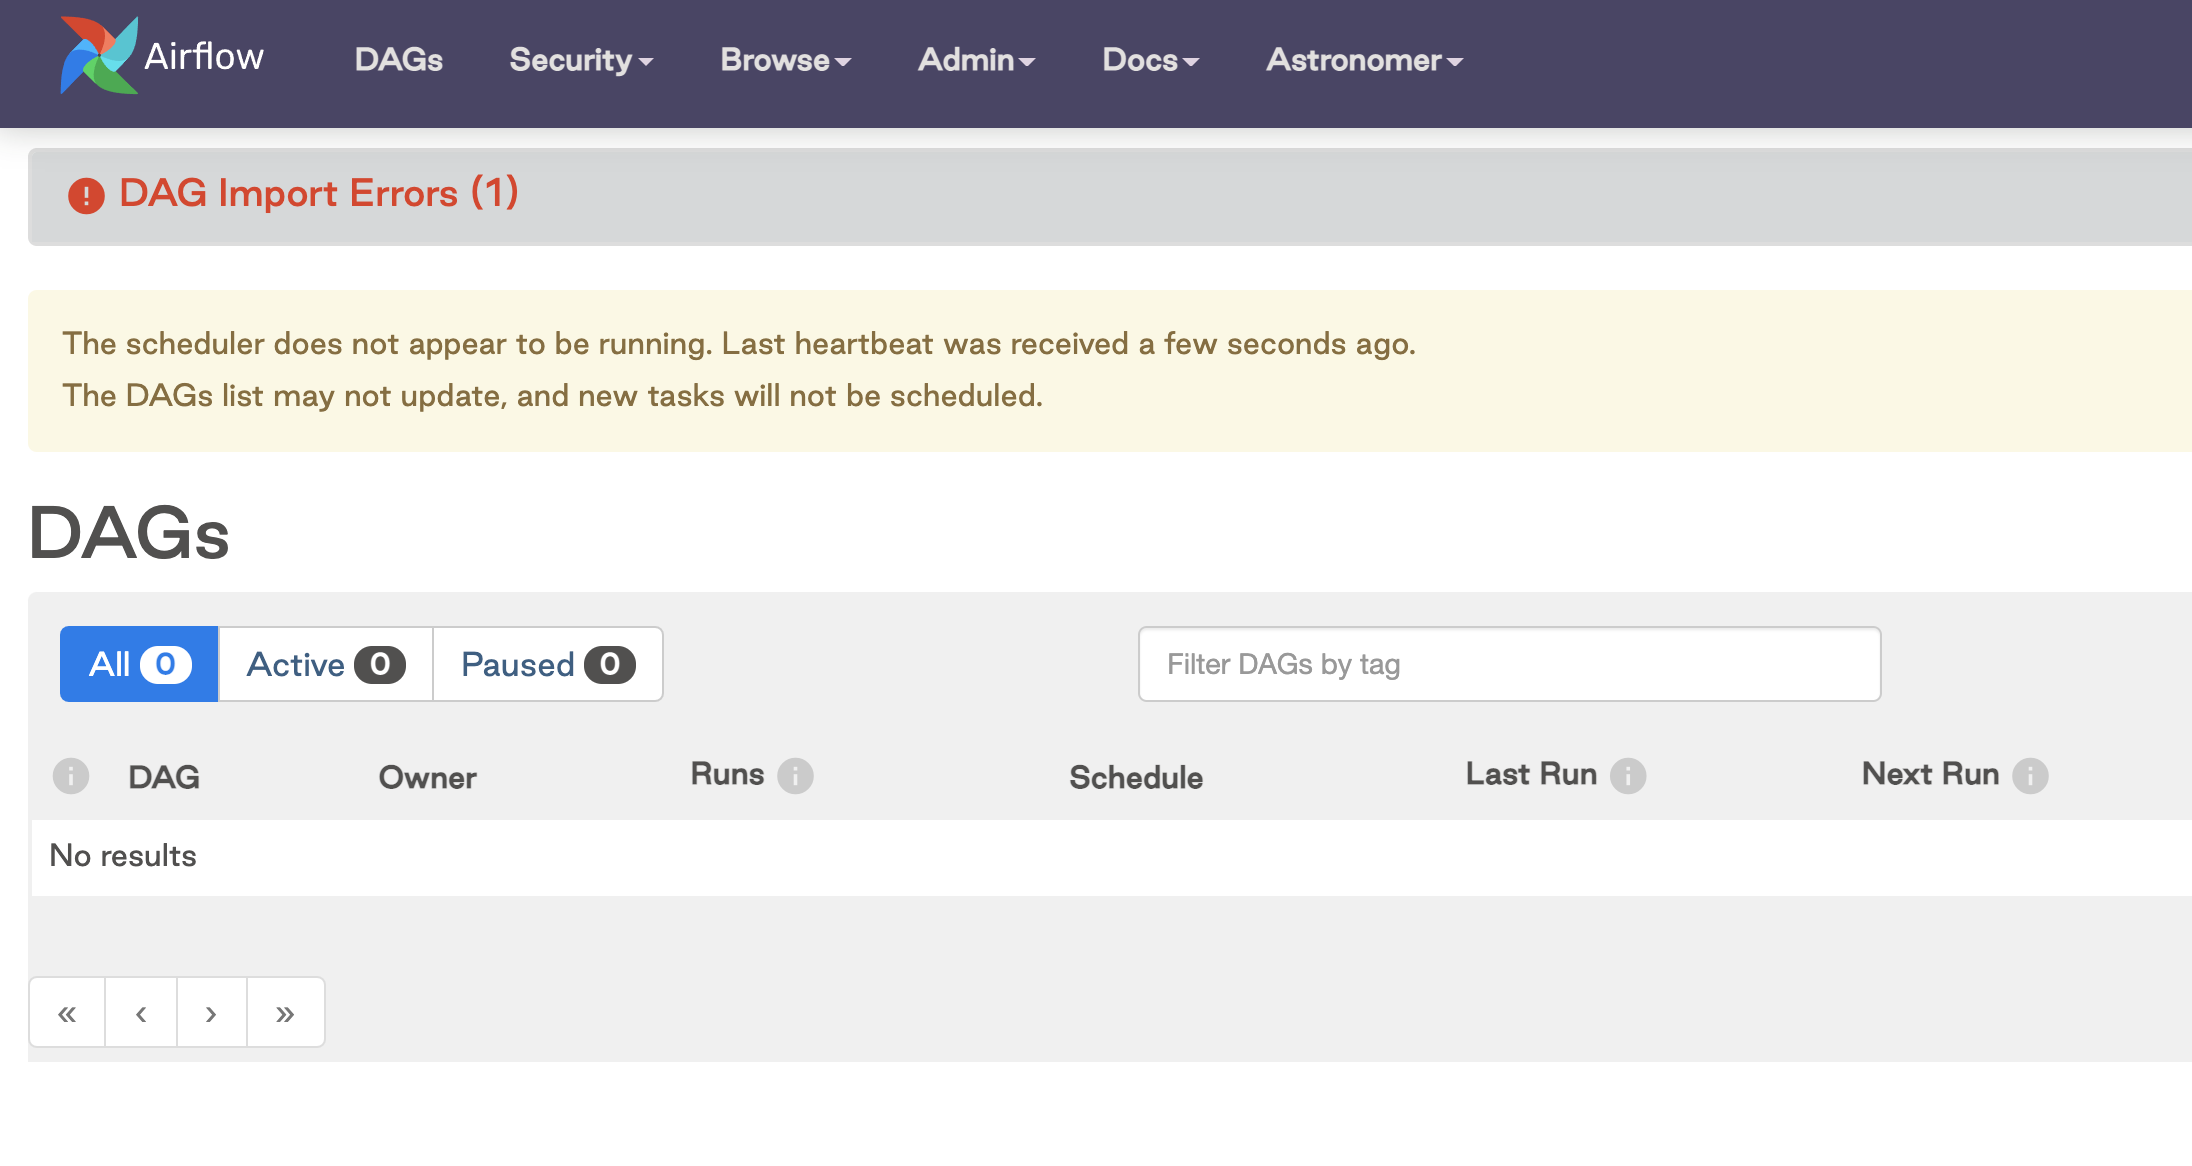
If DAGs don't appear in the Airflow UI when working from an Astronomer Airflow Deployment, there are a few additional things you can check:
- Ensure your Dockerfile Runtime and Astronomer Certified version matches the Airflow version of your Deployment. A mismatch can cause DAGs not to appear after deployment.
- For Astronomer Certified images, ensure that you are using the
onbuildimage. For example,FROM quay.io/astronomer/ap-airflow:2.2.2-buster-onbuild. Images withoutonbuildwill not bundle files in thedags/folder when deployed. - Ensure that the permissions on your local files aren't too restrictive. See DAGs aren’t showing up in my Astronomer deployment, but I see them locally.
Dependency conflicts
A frequent cause of DAG import errors is not having supporting packages installed in your Airflow environment. For example, provider packages that your DAGs use for hooks and operators must be installed separately.
How you install supporting Python or OS packages is determined by your Airflow setup. If you are working with an Astronomer project, you can add Python and OS packages to your requirements.txt and packages.txt files respectively, and they will be automatically installed when your Docker image builds when you deploy or start a project locally.
One thing to watch for, especially with Python packages, is dependency conflicts. If you are running Airflow using Docker, these conflicts can cause errors when you build your image. With the Astro CLI, errors and warnings are printed in your terminal when you run astro dev start, and you might see import errors for your DAGs in the Airflow UI when packages fail to install. In general, all packages you install should be available in your scheduler pod. To confirm you packages were installed successfully, see Confirm your package was installed.
If you're unable to resolve package conflicts, add your DAGs to multiple projects that are run on separate Airflow deployments so that DAGs requiring conflicting packages are not in the same environment. For example, you might have a set of DAGs that require package X that run on Airflow Deployment A, and another set of DAGs that require package Y (which conflicts with package X) that run on Airflow Deployment B. Alternatively, you can use the Kubernetes Pod Operator to isolate package dependencies to a specific task and avoid conflicts in your Airflow environment.
Tasks aren't running
Your DAG is visible in the Airflow UI, but your tasks don't run when you trigger the DAG. This is a common issue and the cause can be very simple or complex. The following are some debugging steps you can try:
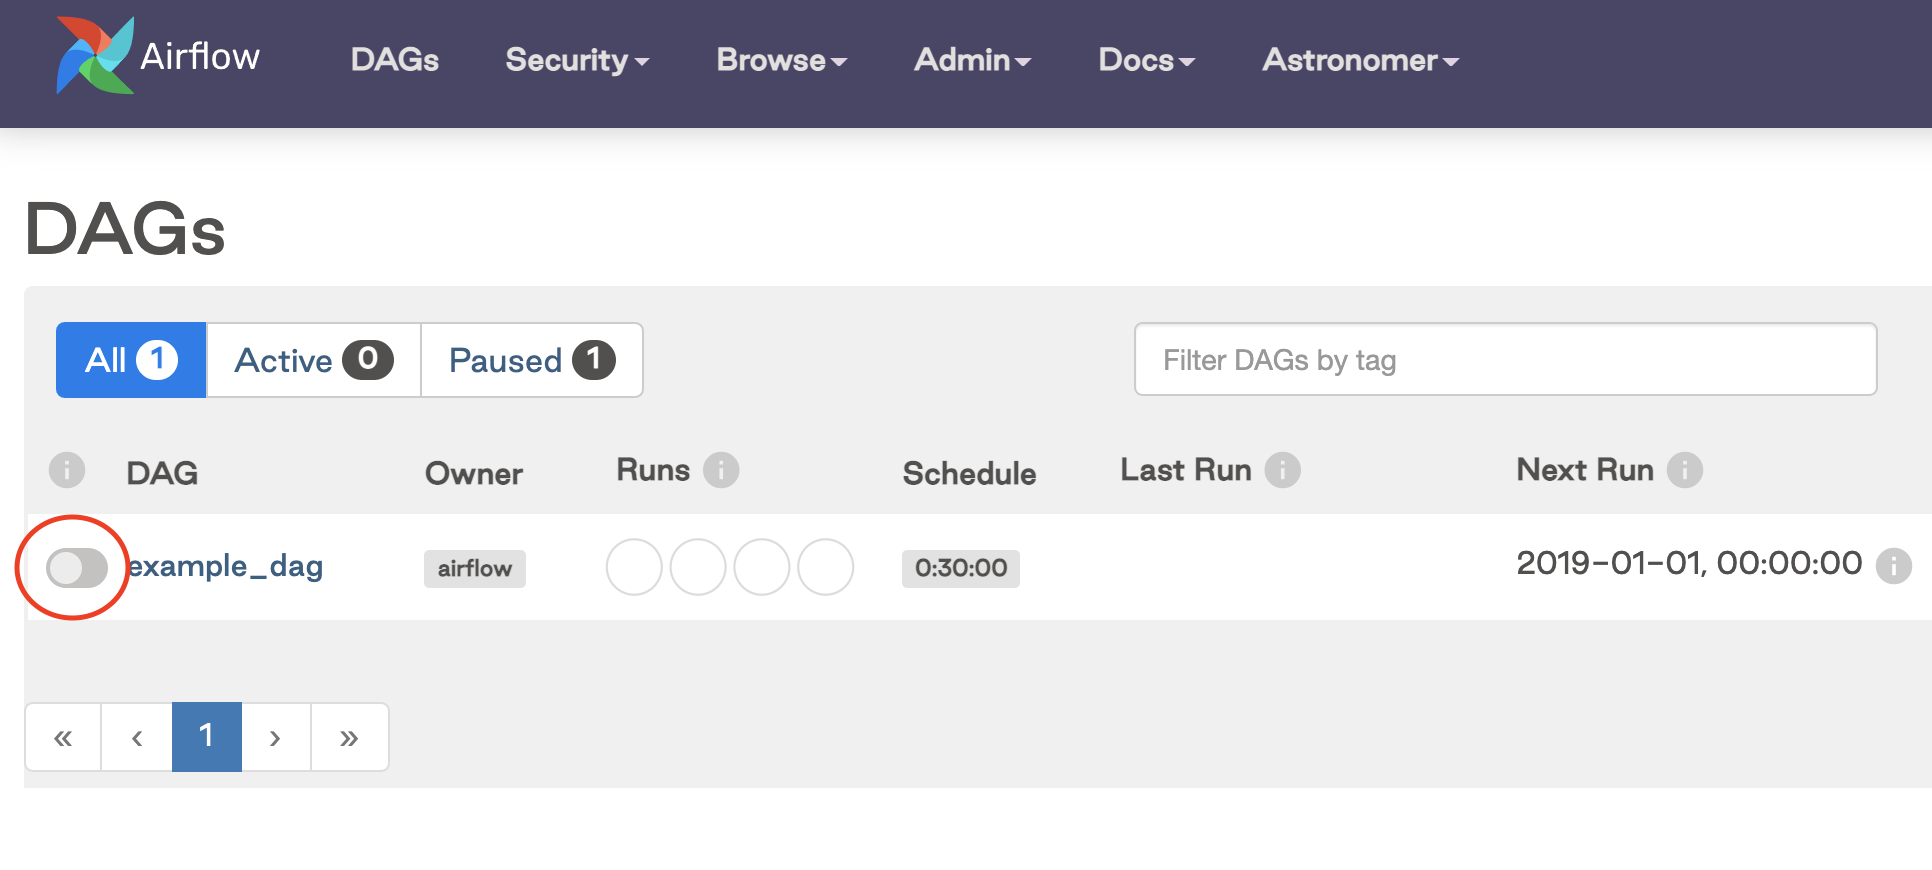
Make sure your DAG is unpaused. If your DAG is paused when you trigger it, the tasks will not run.
DAGs are paused by default, but you can change this behavior by setting
dags_are_paused_at_creation=Falsein your Airflow config. If you do this, be aware of thecatchupparameter in your DAGs.In Airflow 2.2 and later, paused DAGs are unpaused automatically when you manually trigger them.
Ensure your DAG has a start date that is in the past. If your start date is in the future, triggering the DAG results in a successful DAG run even though no tasks ran.
A DAG run is automatically triggered when you unpause the DAG if the start date and end of the data interval are both in the past, and
catchup=True. For more details on data intervals and DAG scheduling, see Scheduling and Timetables in Airflow.If you are using a custom timetable, ensure that the data interval for your DAG run does not precede the DAG start date.
If your tasks stay in a
scheduledorqueuedstate, ensure your scheduler is running properly. If needed, restart the scheduler or increase scheduler resources in your Airflow infrastructure.If you added tasks to an existing DAG that has
depends_on_past=True, those newly added tasks won't run until their state is set for prior task runs.
Tasks have a failure status
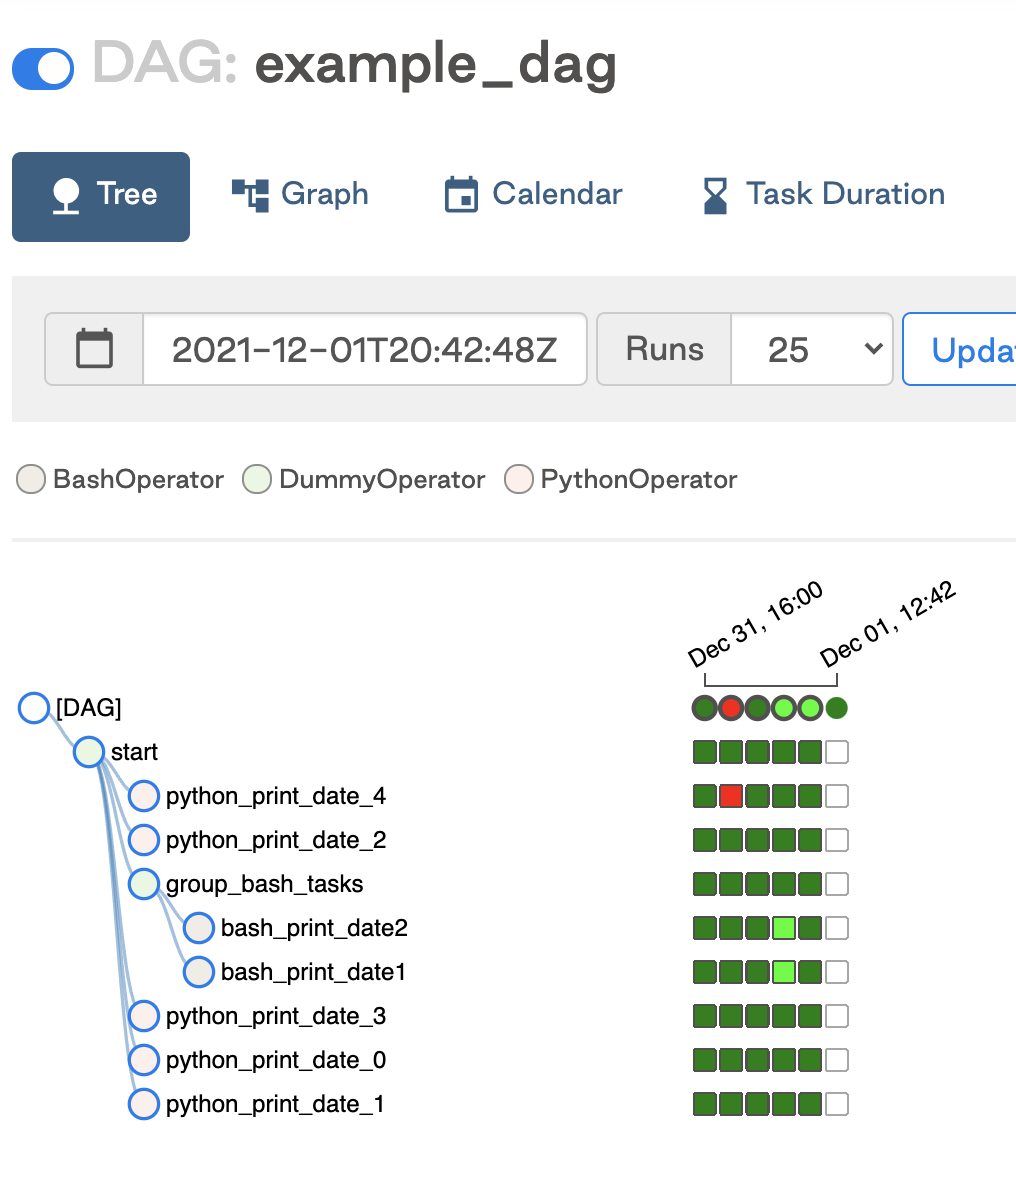
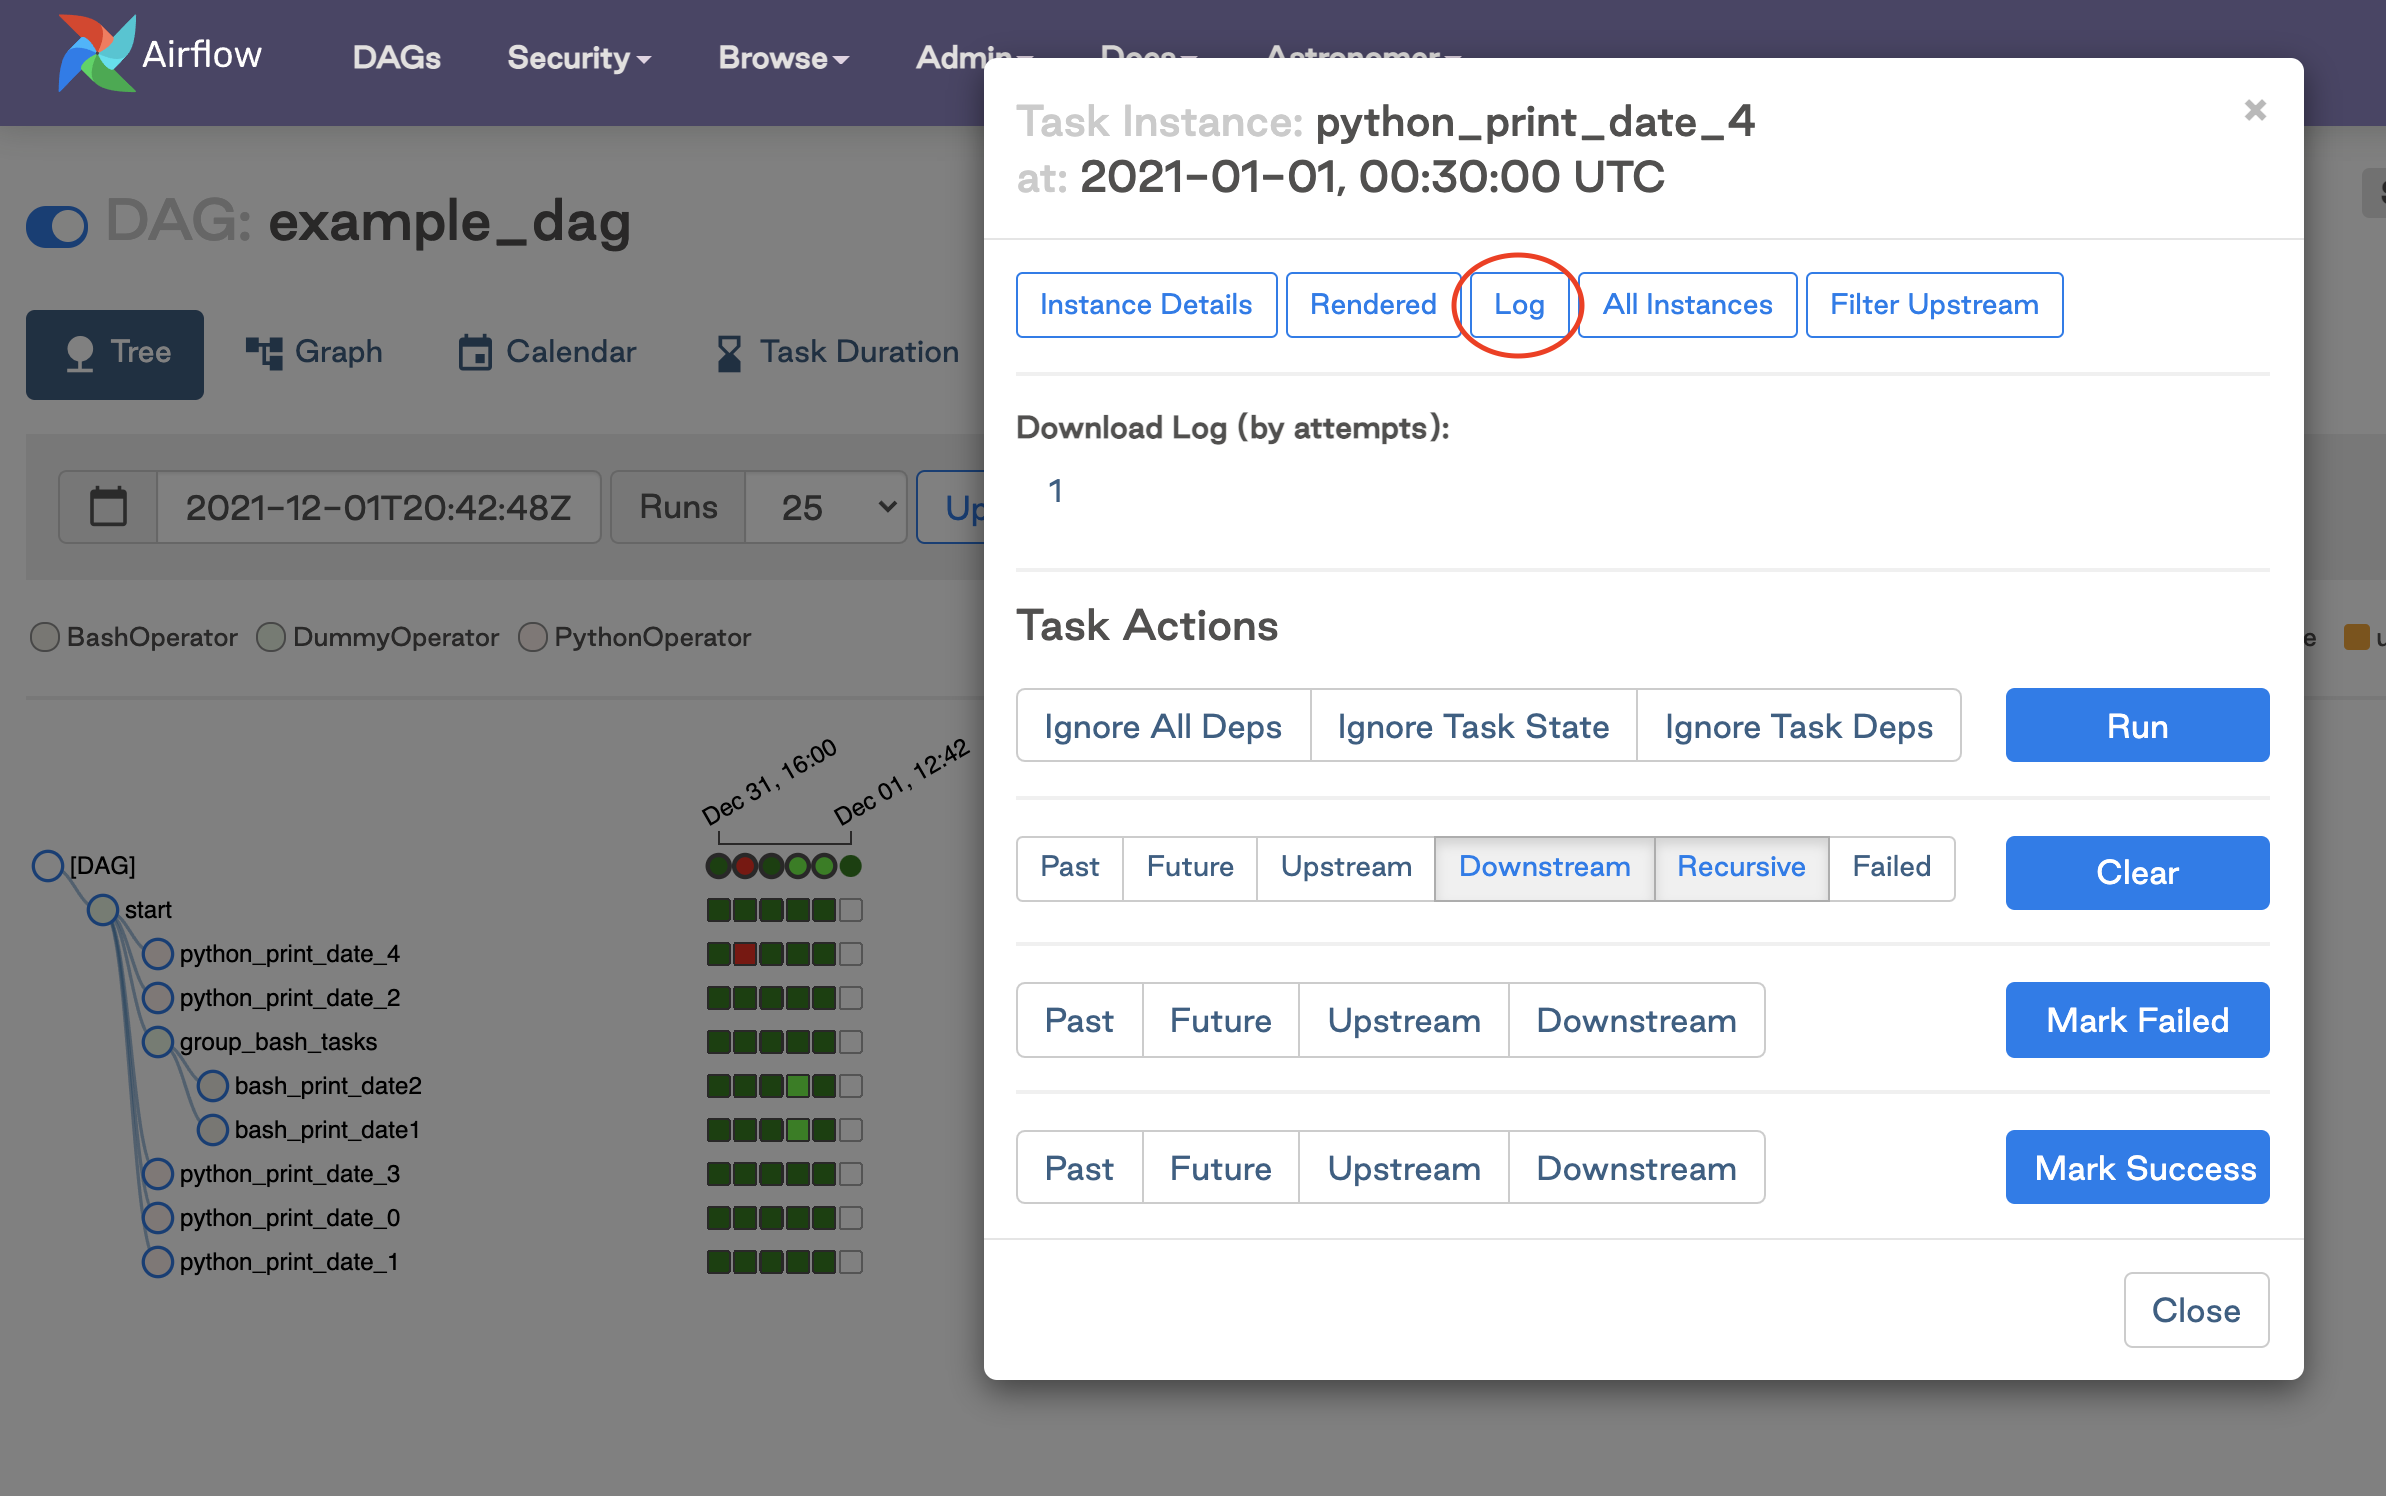
To view task run failure information, go to the Tree View or the Graph View in the Airflow UI. Failed task runs appear as red squares.
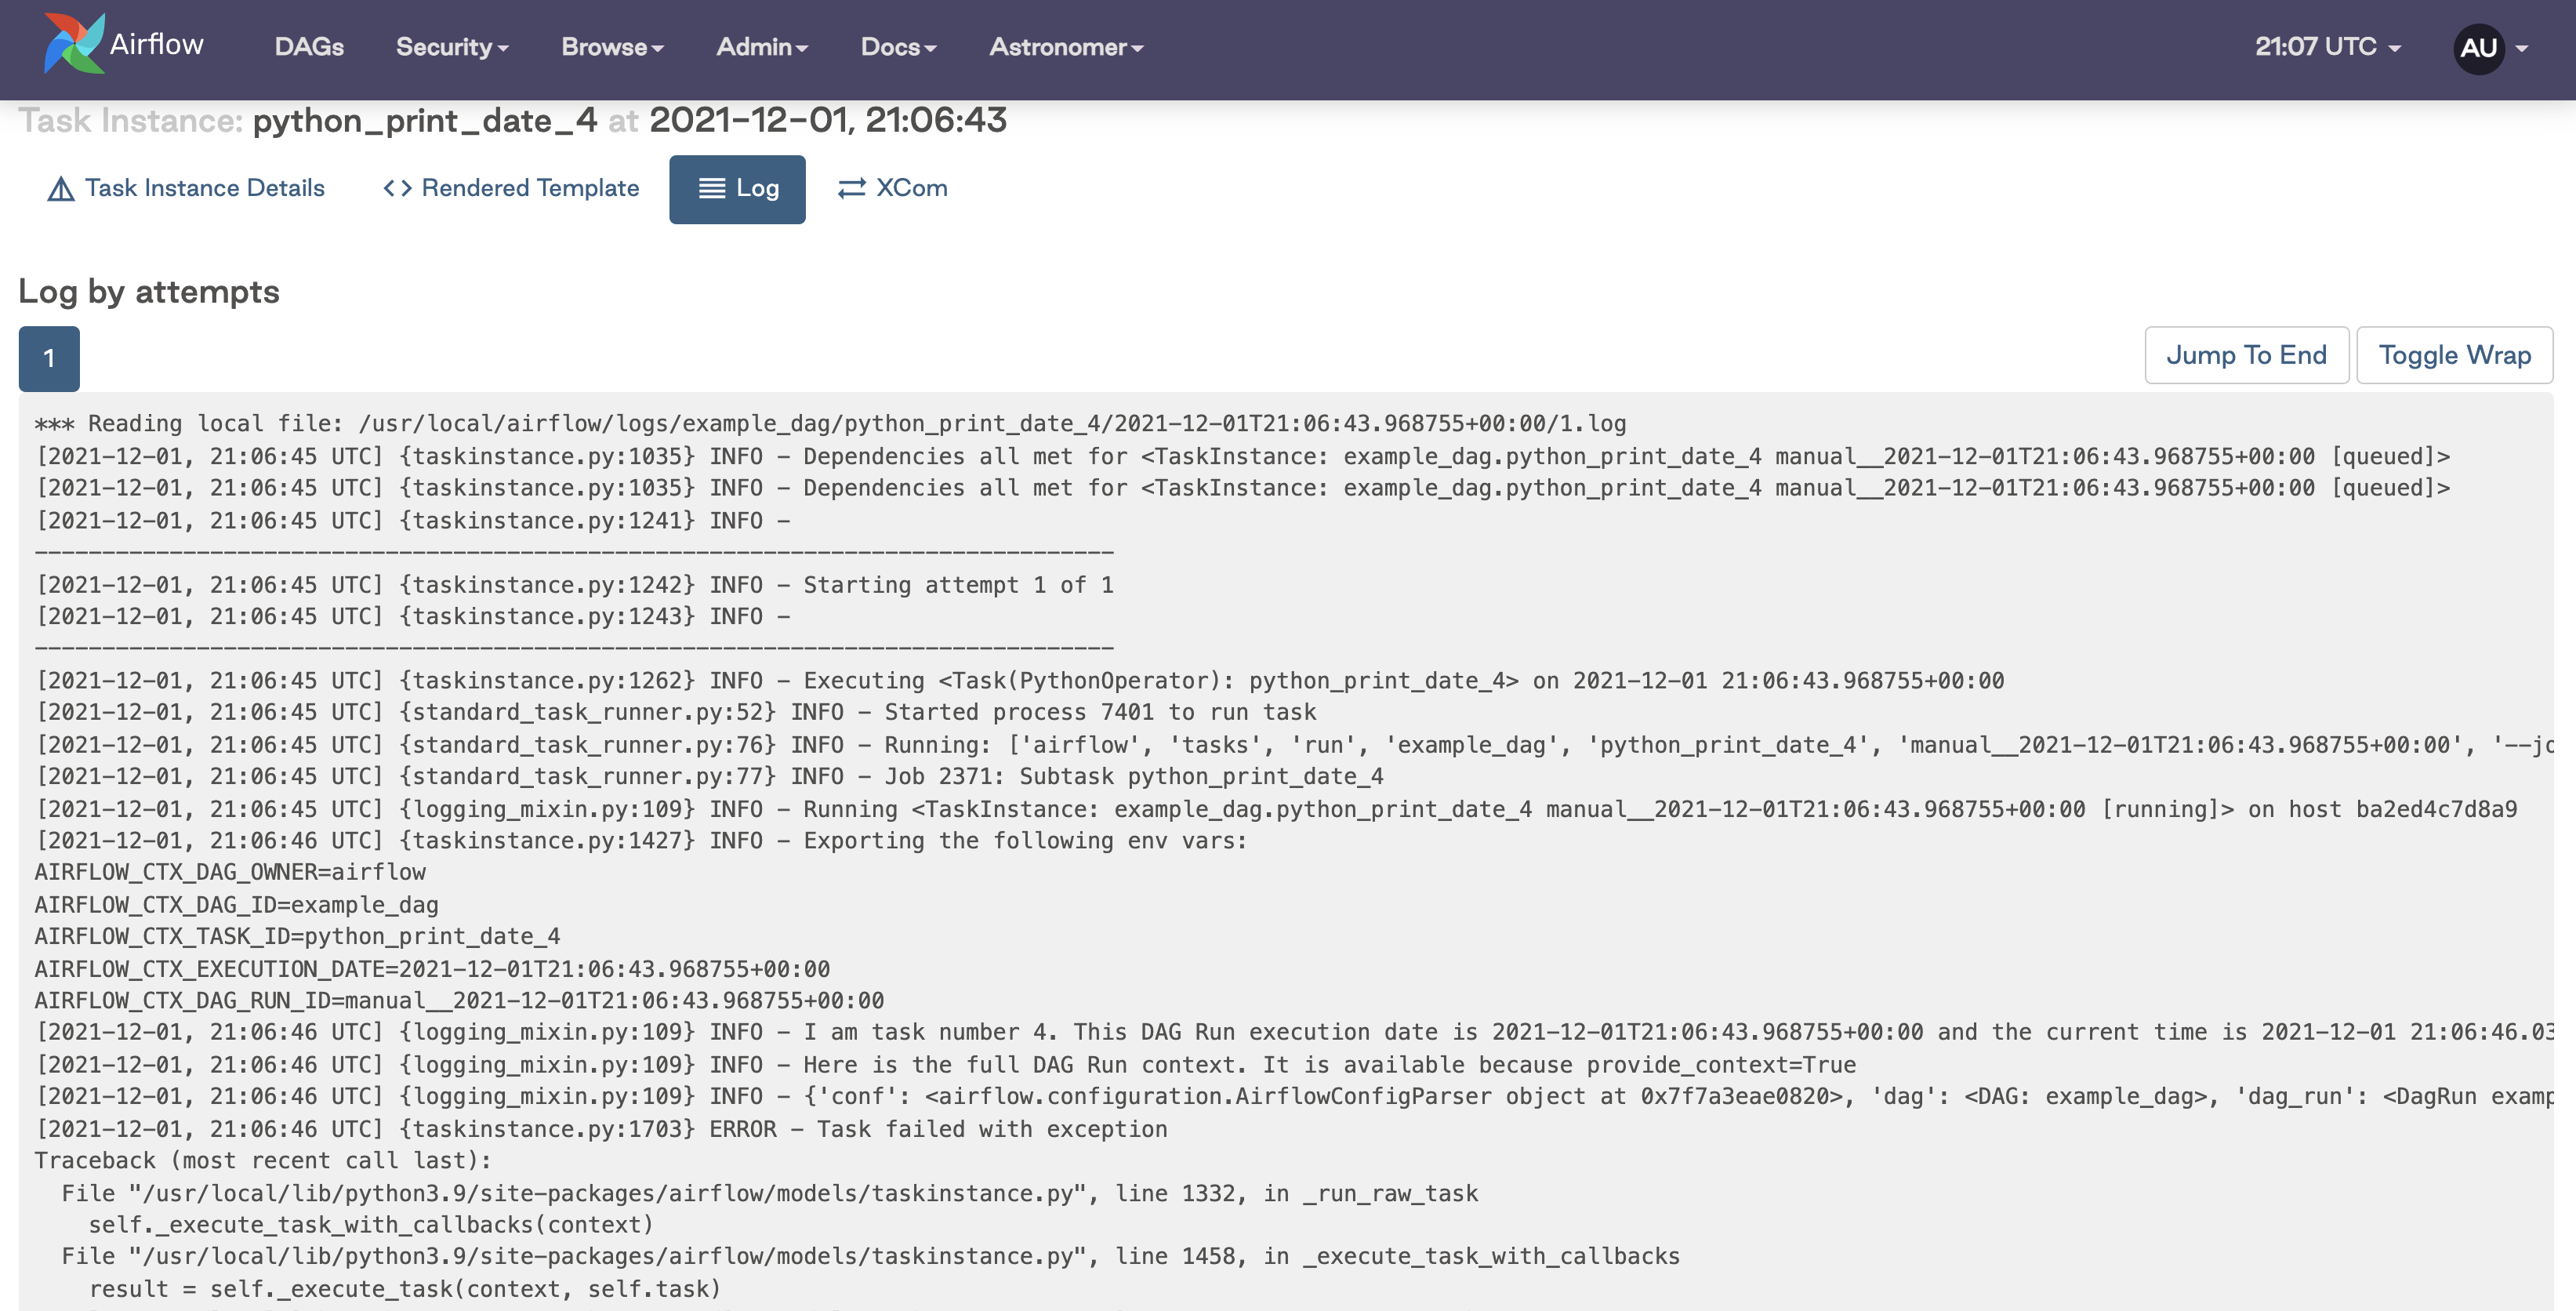
Task logs are your best resource to determine the cause of failures. To access the logs, click the failed task in the Tree View or the Graph View and click the Log.
The task logs provide information about the error that caused the failure.
To help identify and resolve task failures, you can set up error notifications. See Error Notifications in Airflow.
Task failures in newly developed DAGs with error messages such as Task exited with return code Negsignal.SIGKILL or containing a -9 error code are often caused by a lack of memory. Increase the resources for your scheduler, webserver, or pod, depending on whether you're running the Local, Celery, or Kubernetes executors respectively.
Logs aren't appearing
When you check your task logs to debug a failure, you may not see any logs. On the log page in the Airflow UI, you may see a spinning wheel, or you may just see a blank file.
Generally, logs fail to appear when a process dies in your scheduler or worker and communication is lost. The following are some debugging steps you can try:
- Try rerunning the task by clearing the task instance to see if the logs appear during the rerun.
- Increase your
log_fetch_timeout_secparameter to greater than the 5 second default. This parameter controls how long the webserver waits for the initial handshake when fetching logs from the worker machines, and having extra time here can sometimes resolve issues. - Increase the resources available to your workers (if using the Celery executor) or scheduler (if using the local executor).
- If you're using the Kubernetes executor and a task fails very quickly (in less than 15 seconds), the pod running the task spins down before the webserver has a chance to collect the logs from the pod. If possible, try building in some wait time to your task depending on which operator you're using. If that isn't possible, try to diagnose what could be causing a near-immediate failure in your task. This is often related to either lack of resources or an error in the task configuration.
- Increase the CPU or memory for the task.
- Ensure that your logs are retained until you need to access them. The default log retention period on Astronomer is 15 days, so any logs outside of the retention period are not available.
- Check your scheduler and webserver logs for any errors that might indicate why your task logs aren't appearing.
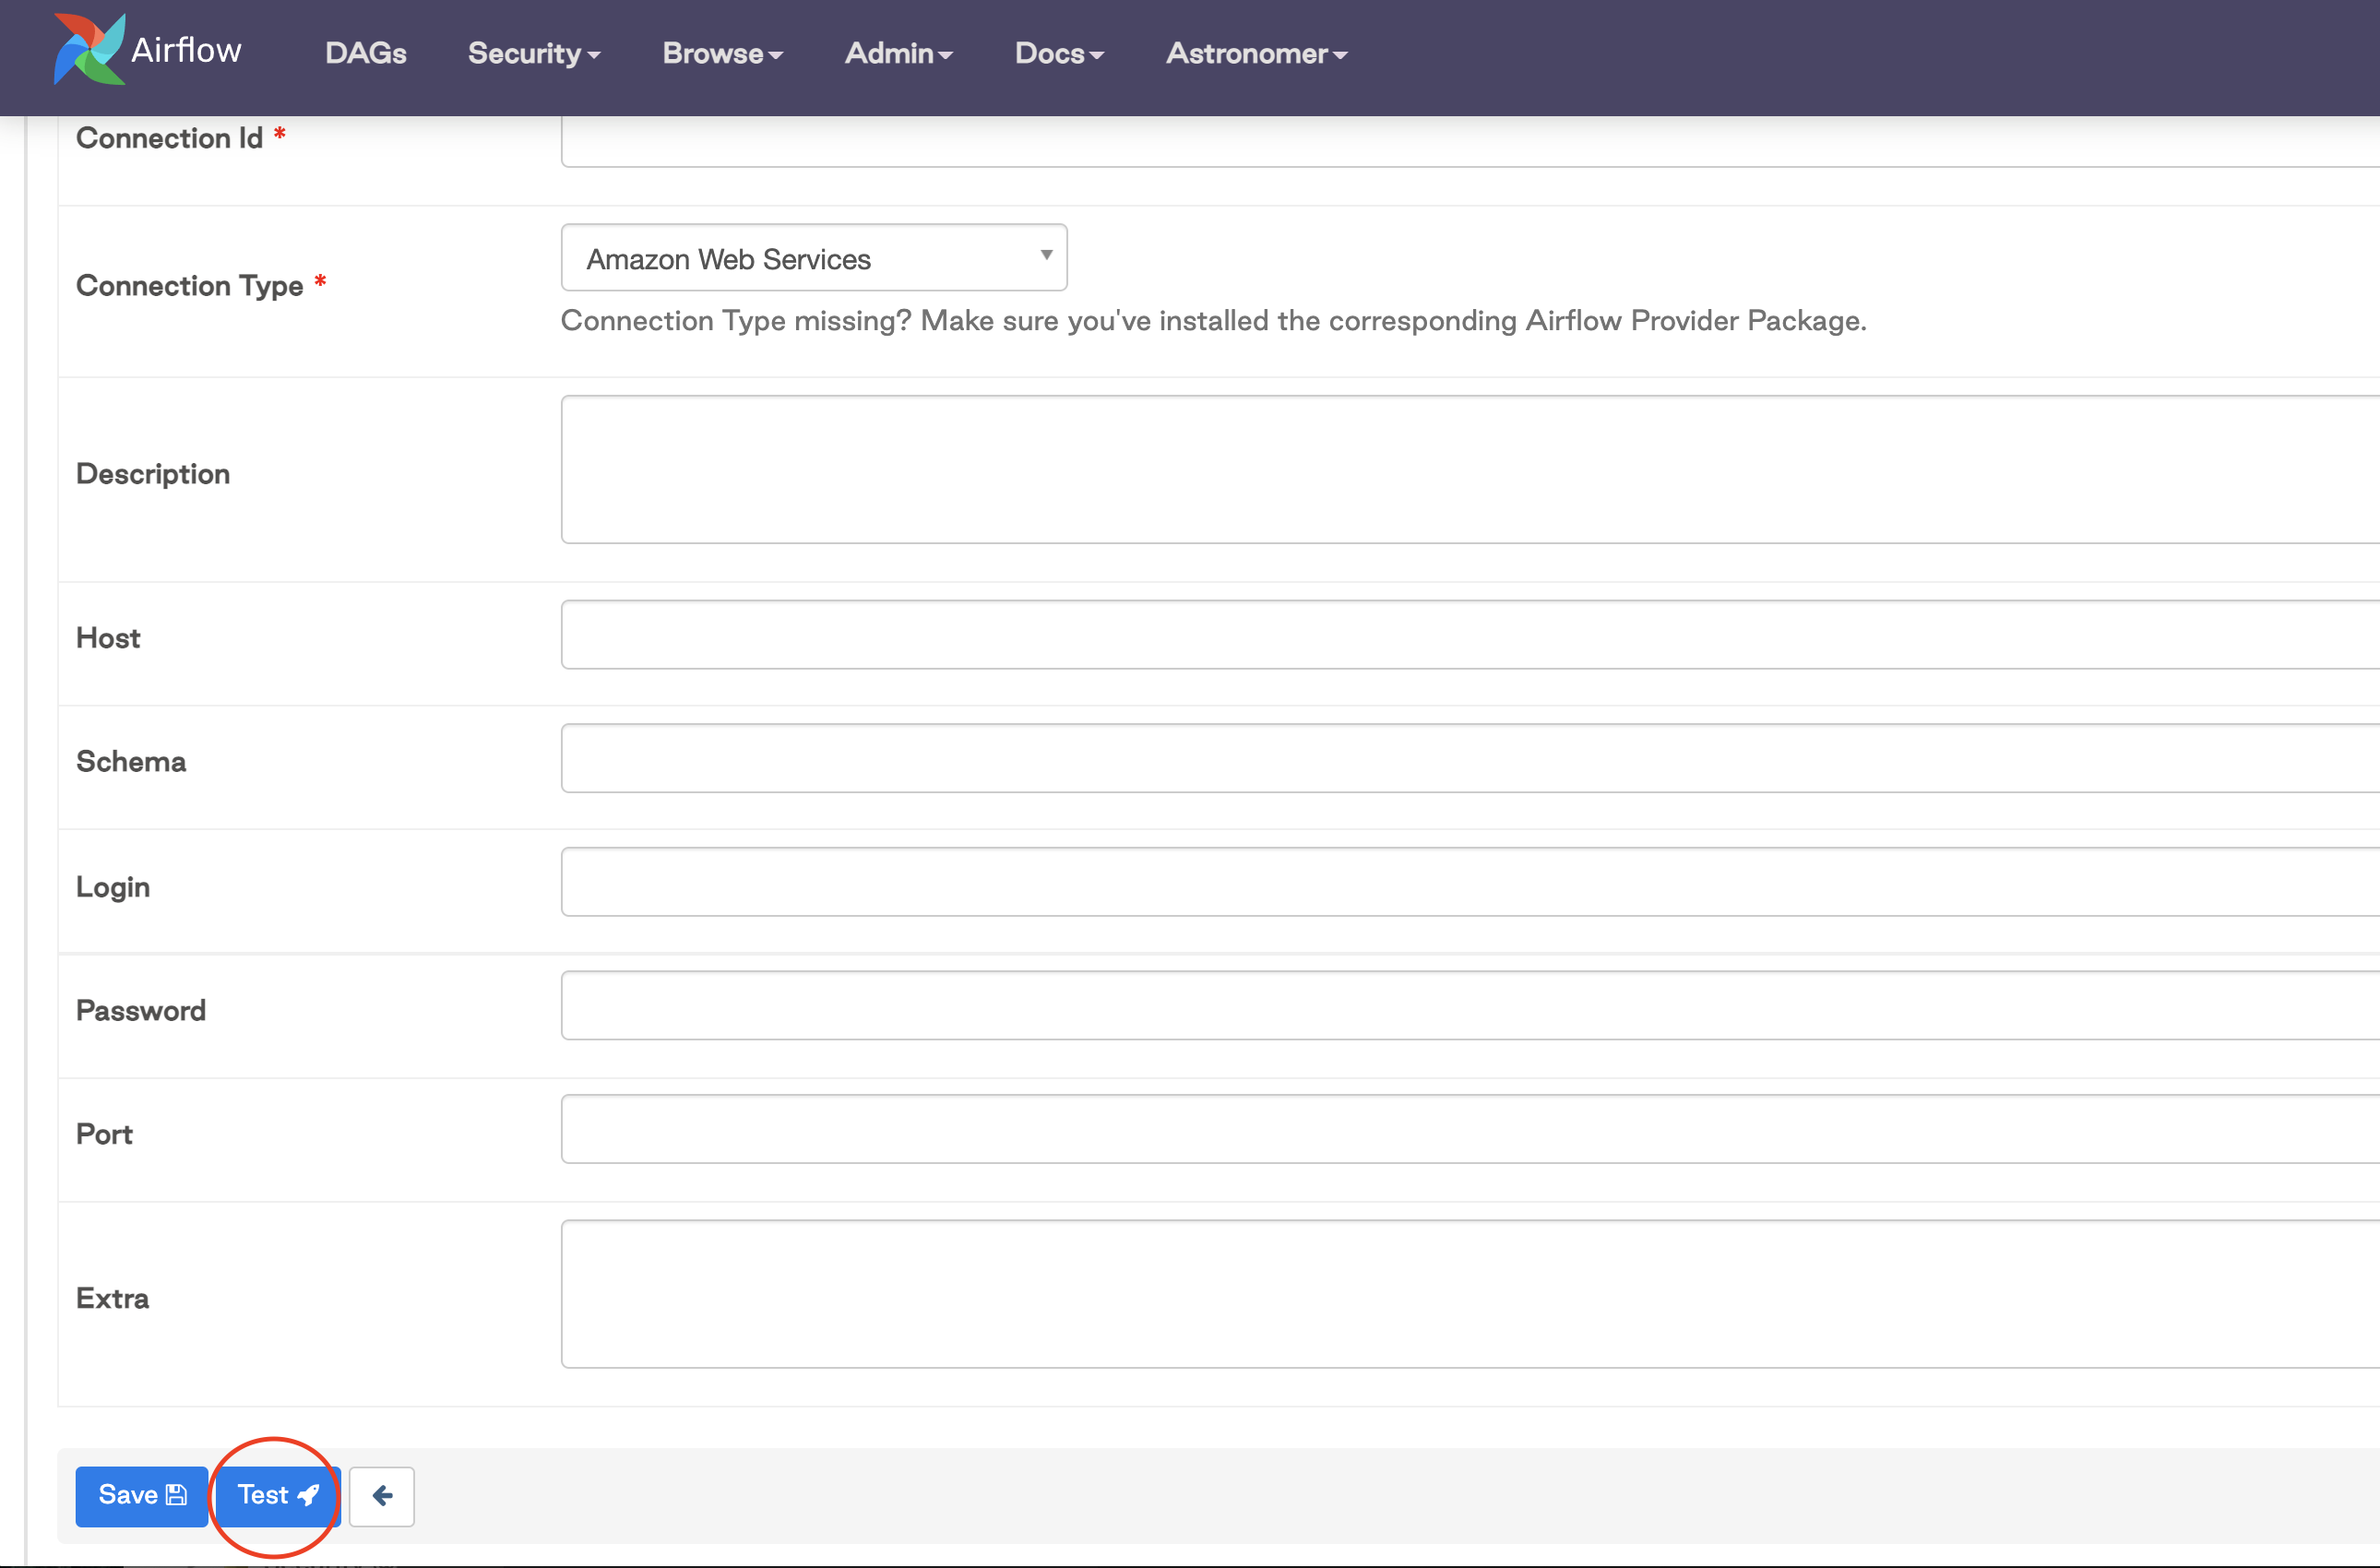
Troubleshooting connections
Typically, Airflow connections are needed to allow Airflow to communicate with external systems. Most hooks and operators expect a defined connection parameter. Because of this, improperly defined connections are one of the most common issues Airflow users have to debug when first working with their DAGs.
While the specific error associated with a poorly defined connection can vary widely, you will typically see a message with "connection" in your task logs. If you haven't defined a connection, you'll see a message such as 'connection_abc' is not defined.
The following are some debugging steps you can try:
Review Managing Connections to learn how connections work.
Change the
defaultconnection to use your connection details or define a new connection with a different name and pass that to the hook or operator.Upgrade to Airflow 2.2 or later to use the test connections feature in the Airflow UI or API.
Every hook and operator has its own way of using a connection, and it can be difficult determining what parameters are required. Go to the Astronomer Registry to determine what connections are required for hooks and operators.
Define connections using Airflow environment variables instead of adding them in the Airflow UI. Make sure you're not defining the same connection in multiple places. If you do, the environment variable takes precedence.
Recover from failures
If you've made any changes to your code, make sure to redeploy and use the code view in the Airflow UI to make sure that your changes have been captured by Airflow.
To rerun your DAG or a specific task after you've made changes, see Rerunning Tasks.
The information provided here should help you resolve the most common issues. For help with more complex issues, consider joining the Apache Airflow Slack or contact Astronomer support.