Orchestrate Azure Data Factory pipelines with Airflow
Azure Data Factory (ADF) is a commonly used service for constructing data pipelines and jobs. With a little preparation, it can be used in combination with Airflow to leverage the best of both tools. In this guide, we'll discuss why you might want to use these two tools together, how Airflow can be used to execute ADF jobs, and a simple example tutorial showing how it all fits together.
All code in this guide can be found on the Astronomer Registry.
Assumed knowledge
To get the most out of this tutorial, make sure you have an understanding of:
- The basics of Azure Data Factory. See Introduction to Data Factory.
- Airflow fundamentals, such as writing DAGs and defining tasks. See Get started with Apache Airflow.
- Airflow operators. See Operators 101.
- Airflow connections. See Managing your Connections in Apache Airflow.
Why use Airflow with ADF
ADF is an easy to learn tool that allows you to quickly create jobs without writing code. It integrates seamlessly with on-premises data sources and other Azure services. However, it has some disadvantages when used alone - namely:
- Building and integrating custom tools can be difficult
- Integrations with services outside of Azure are limited
- Orchestration capabilities are limited
- Custom packages and dependencies can be complex to manage
That's where Airflow comes in. ADF jobs can be run using an Airflow DAG, giving the full capabilities of Airflow orchestration beyond using ADF alone. This allows users that are comfortable with ADF to write their job there, while Airflow acts as the control plane for orchestration.
ADF modules in Airflow
The Microsoft Azure provider has multiple modules for orchestrating ADF pipelines with Airflow.
AzureDataFactoryHook: Abstracts the ADF API and provides an easy way of connecting to ADF from AirflowAzureDataFactoryRunPipelineOperator: Executes an ADF pipelineAzureDataFactoryPipelineRunStatusSensor: Waits for an ADF pipeline run to complete
If these modules are not quite right for your use case, you can use the AzureDataFactoryHook in your own Python function to take advantage of any ADF API functionality. Understanding how the ADF API works can be helpful when designing your own custom functions or understanding of how the provider modules work.
Example
This example shows how to use ADF operators and sensors to orchestrate multiple ADF pipelines using Airflow.
ADF prerequisites
Before you can orchestrate your ADF pipelines with Airflow, you have to make the pipelines runnable.
If you do not currently have an ADF pipeline in your Azure account and are new to ADF, check out the ADF quick start docs for help getting started.
To make your ADF pipeline accessible by Airflow you will need to register an App with Azure Active Directory to get a Client ID and Client Secret (API Key) for your Data Factory. First, go to Azure Active Directory and click Registered Apps to see a list of registered apps. If you created a Resource group, you should already have an app registered with the same name.
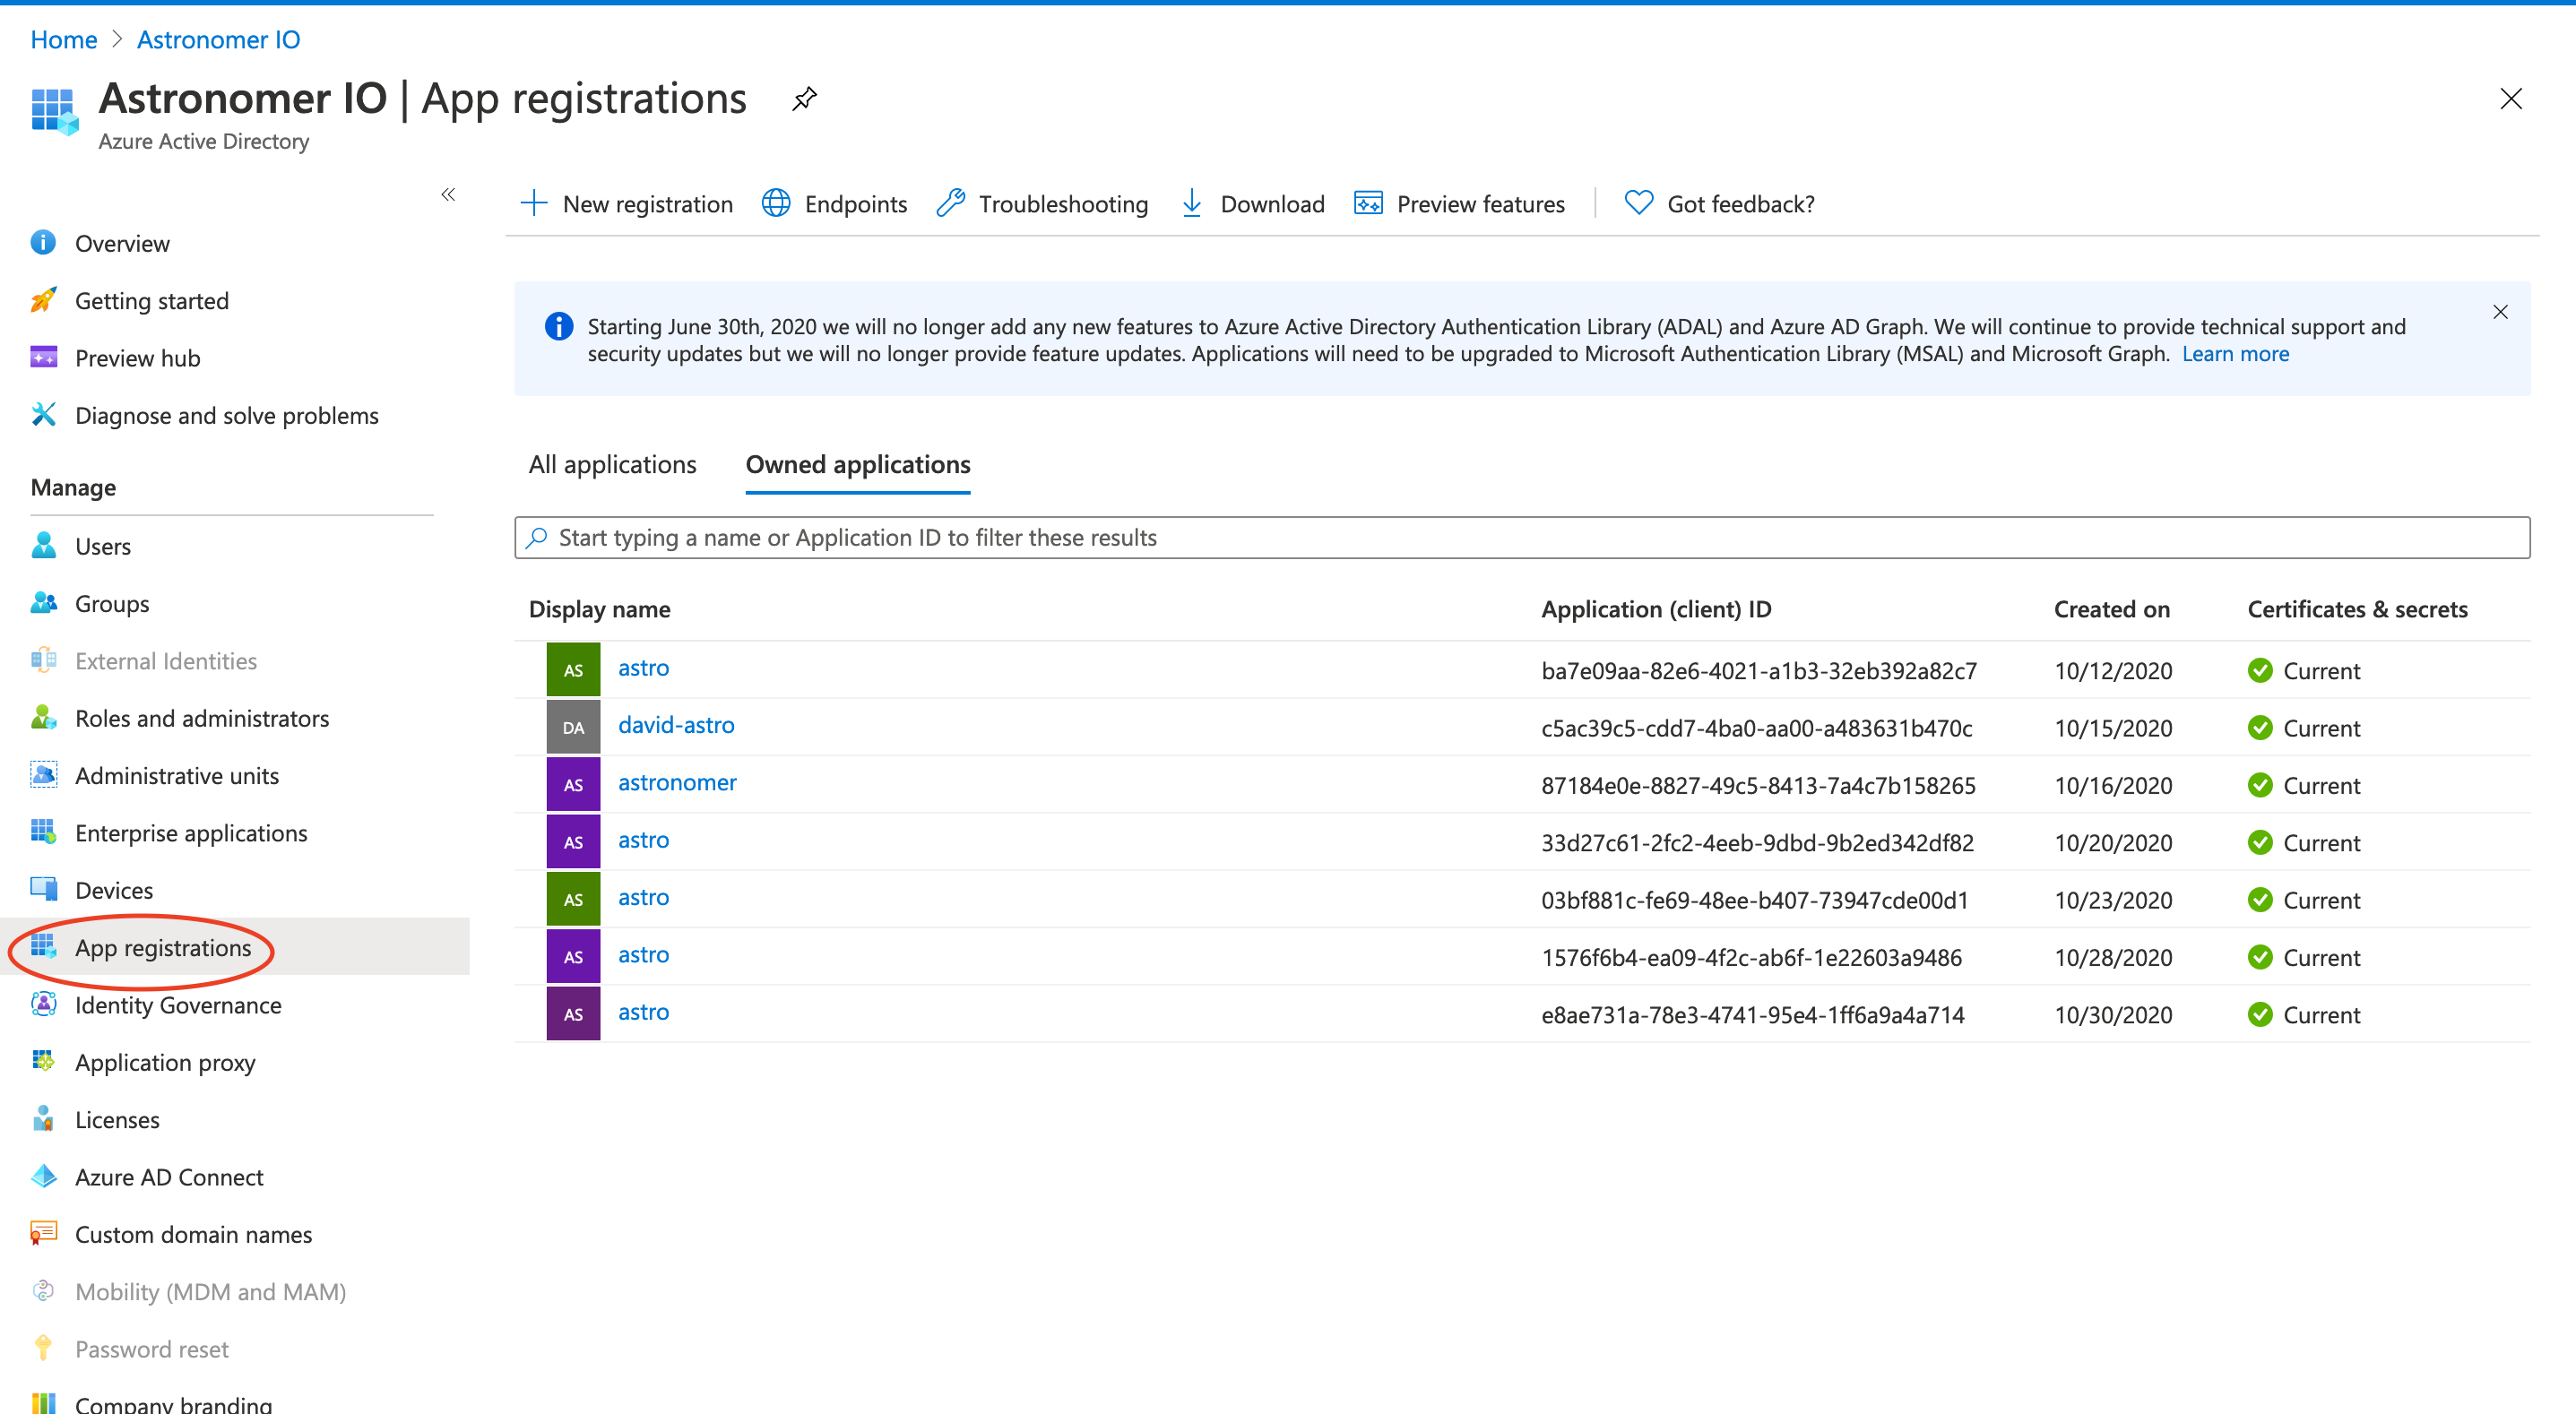
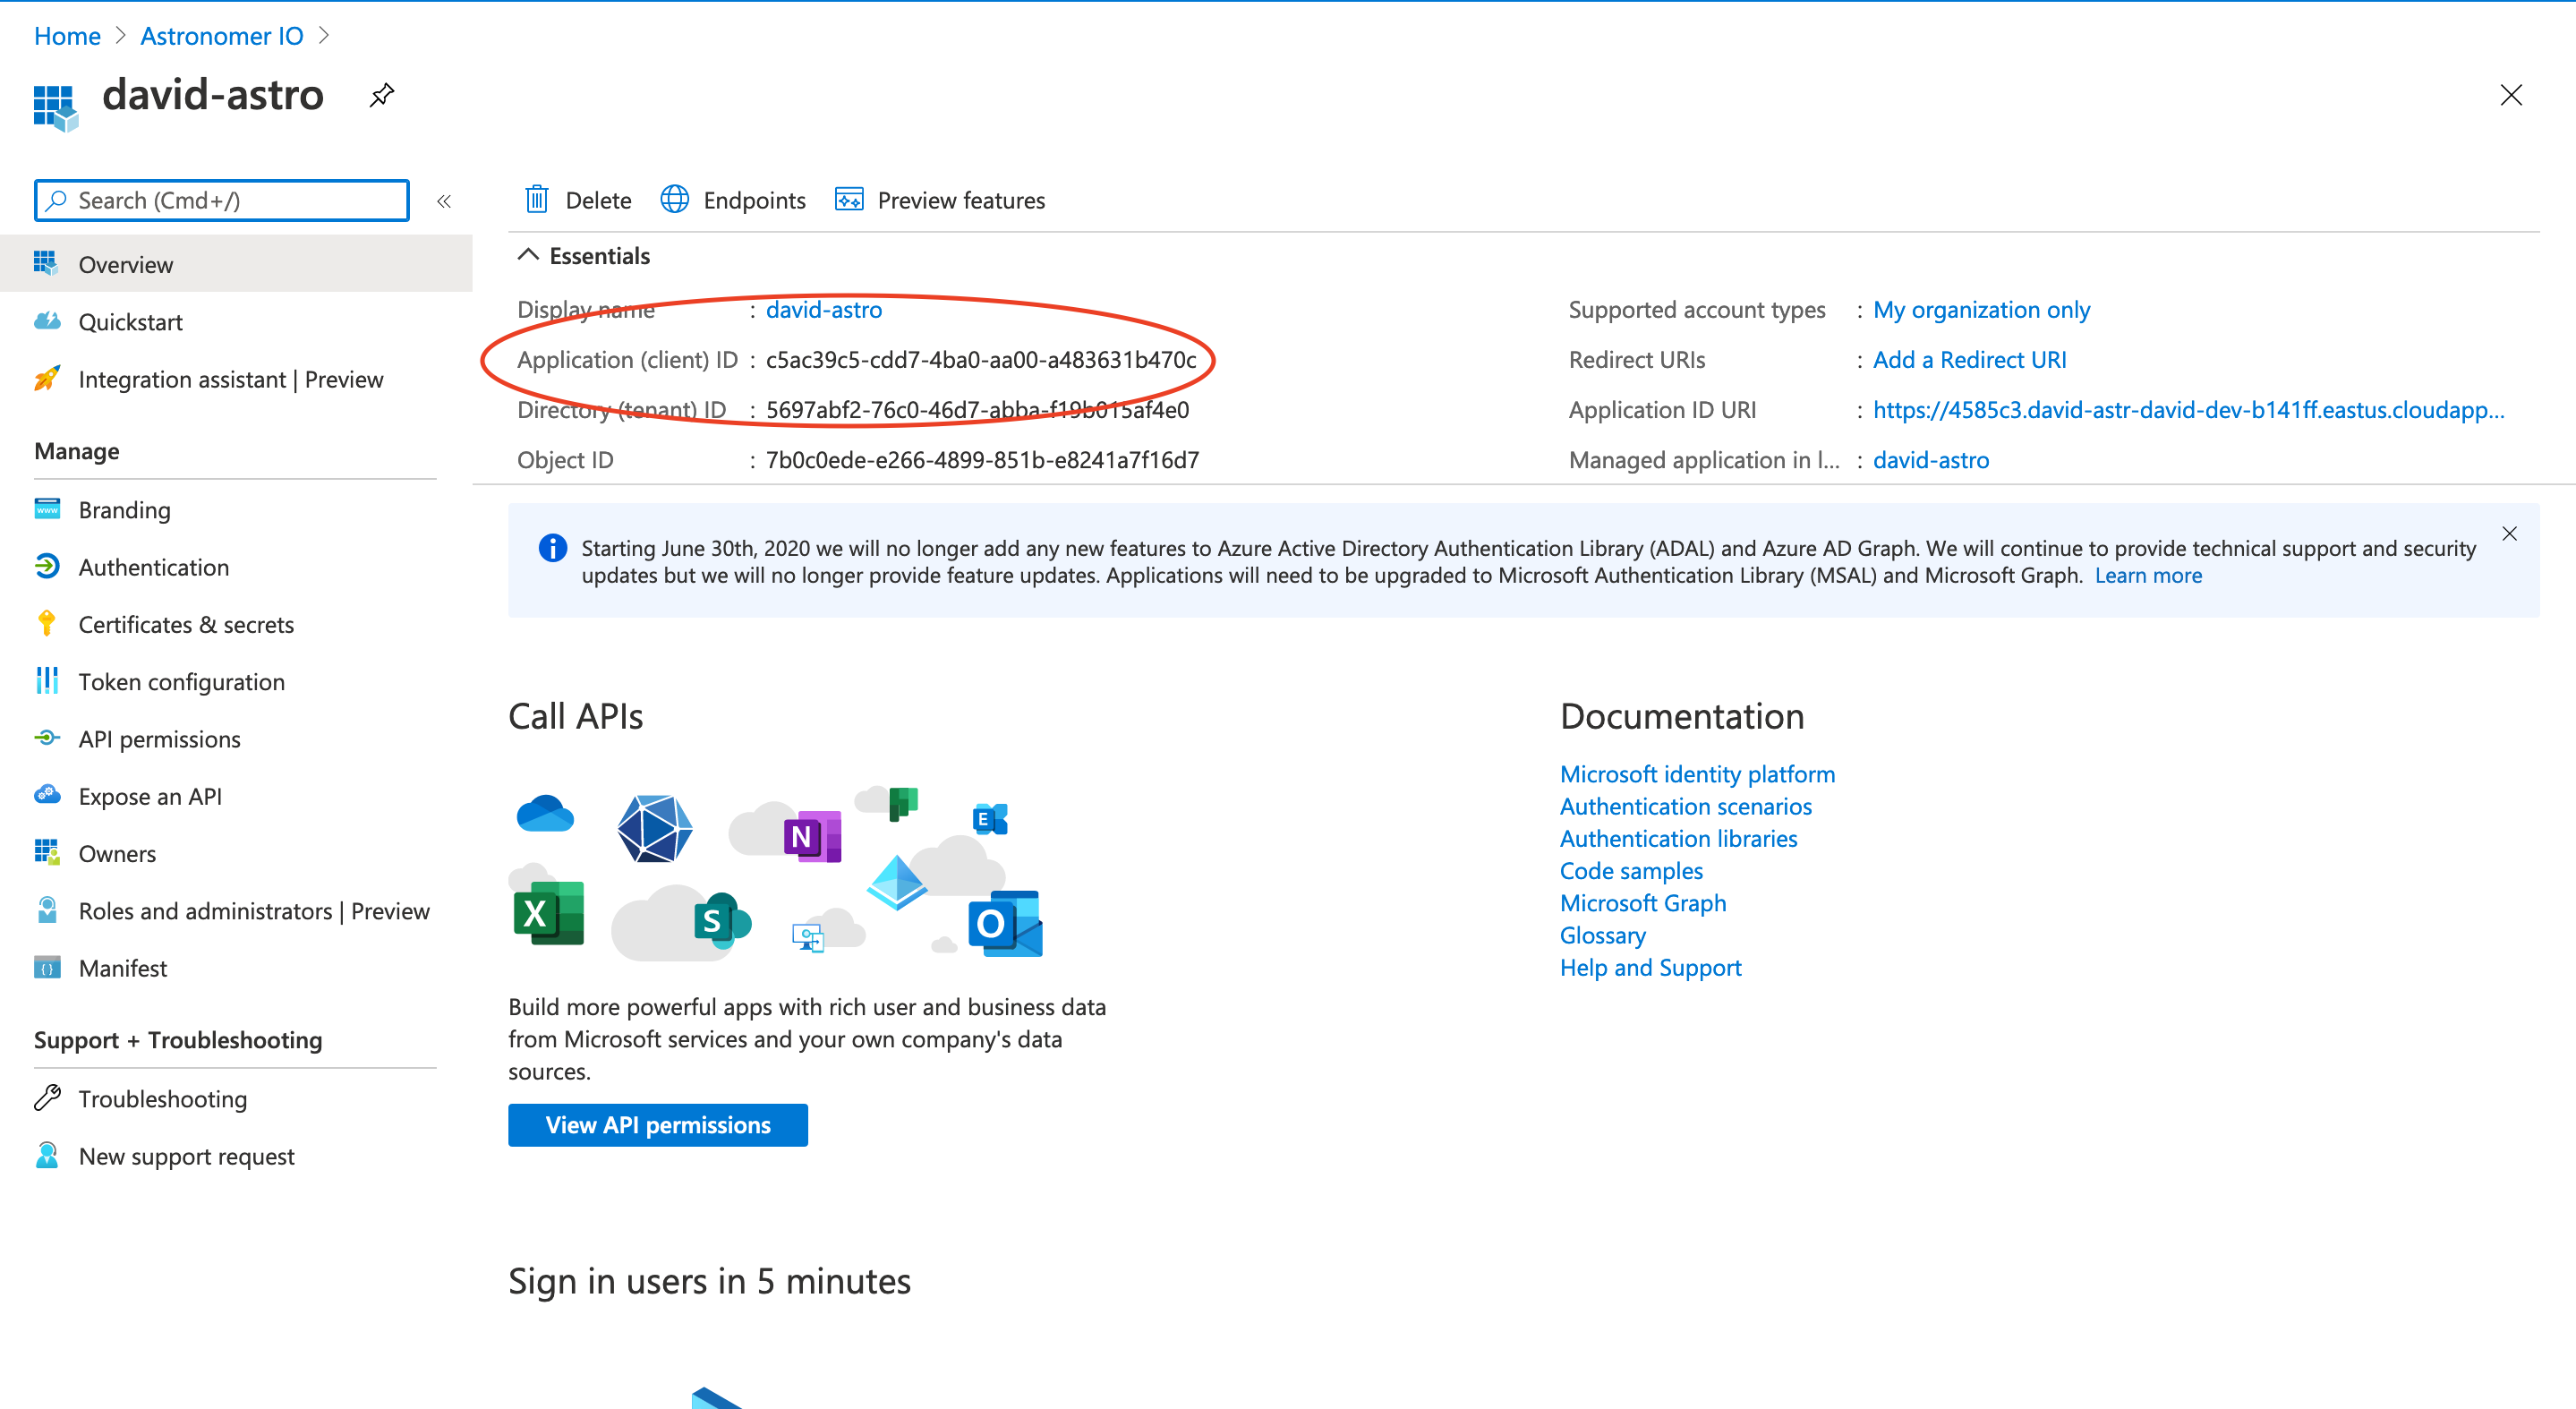
Once there clic the app associated with your resource group to find the Client Id and to create a secret.
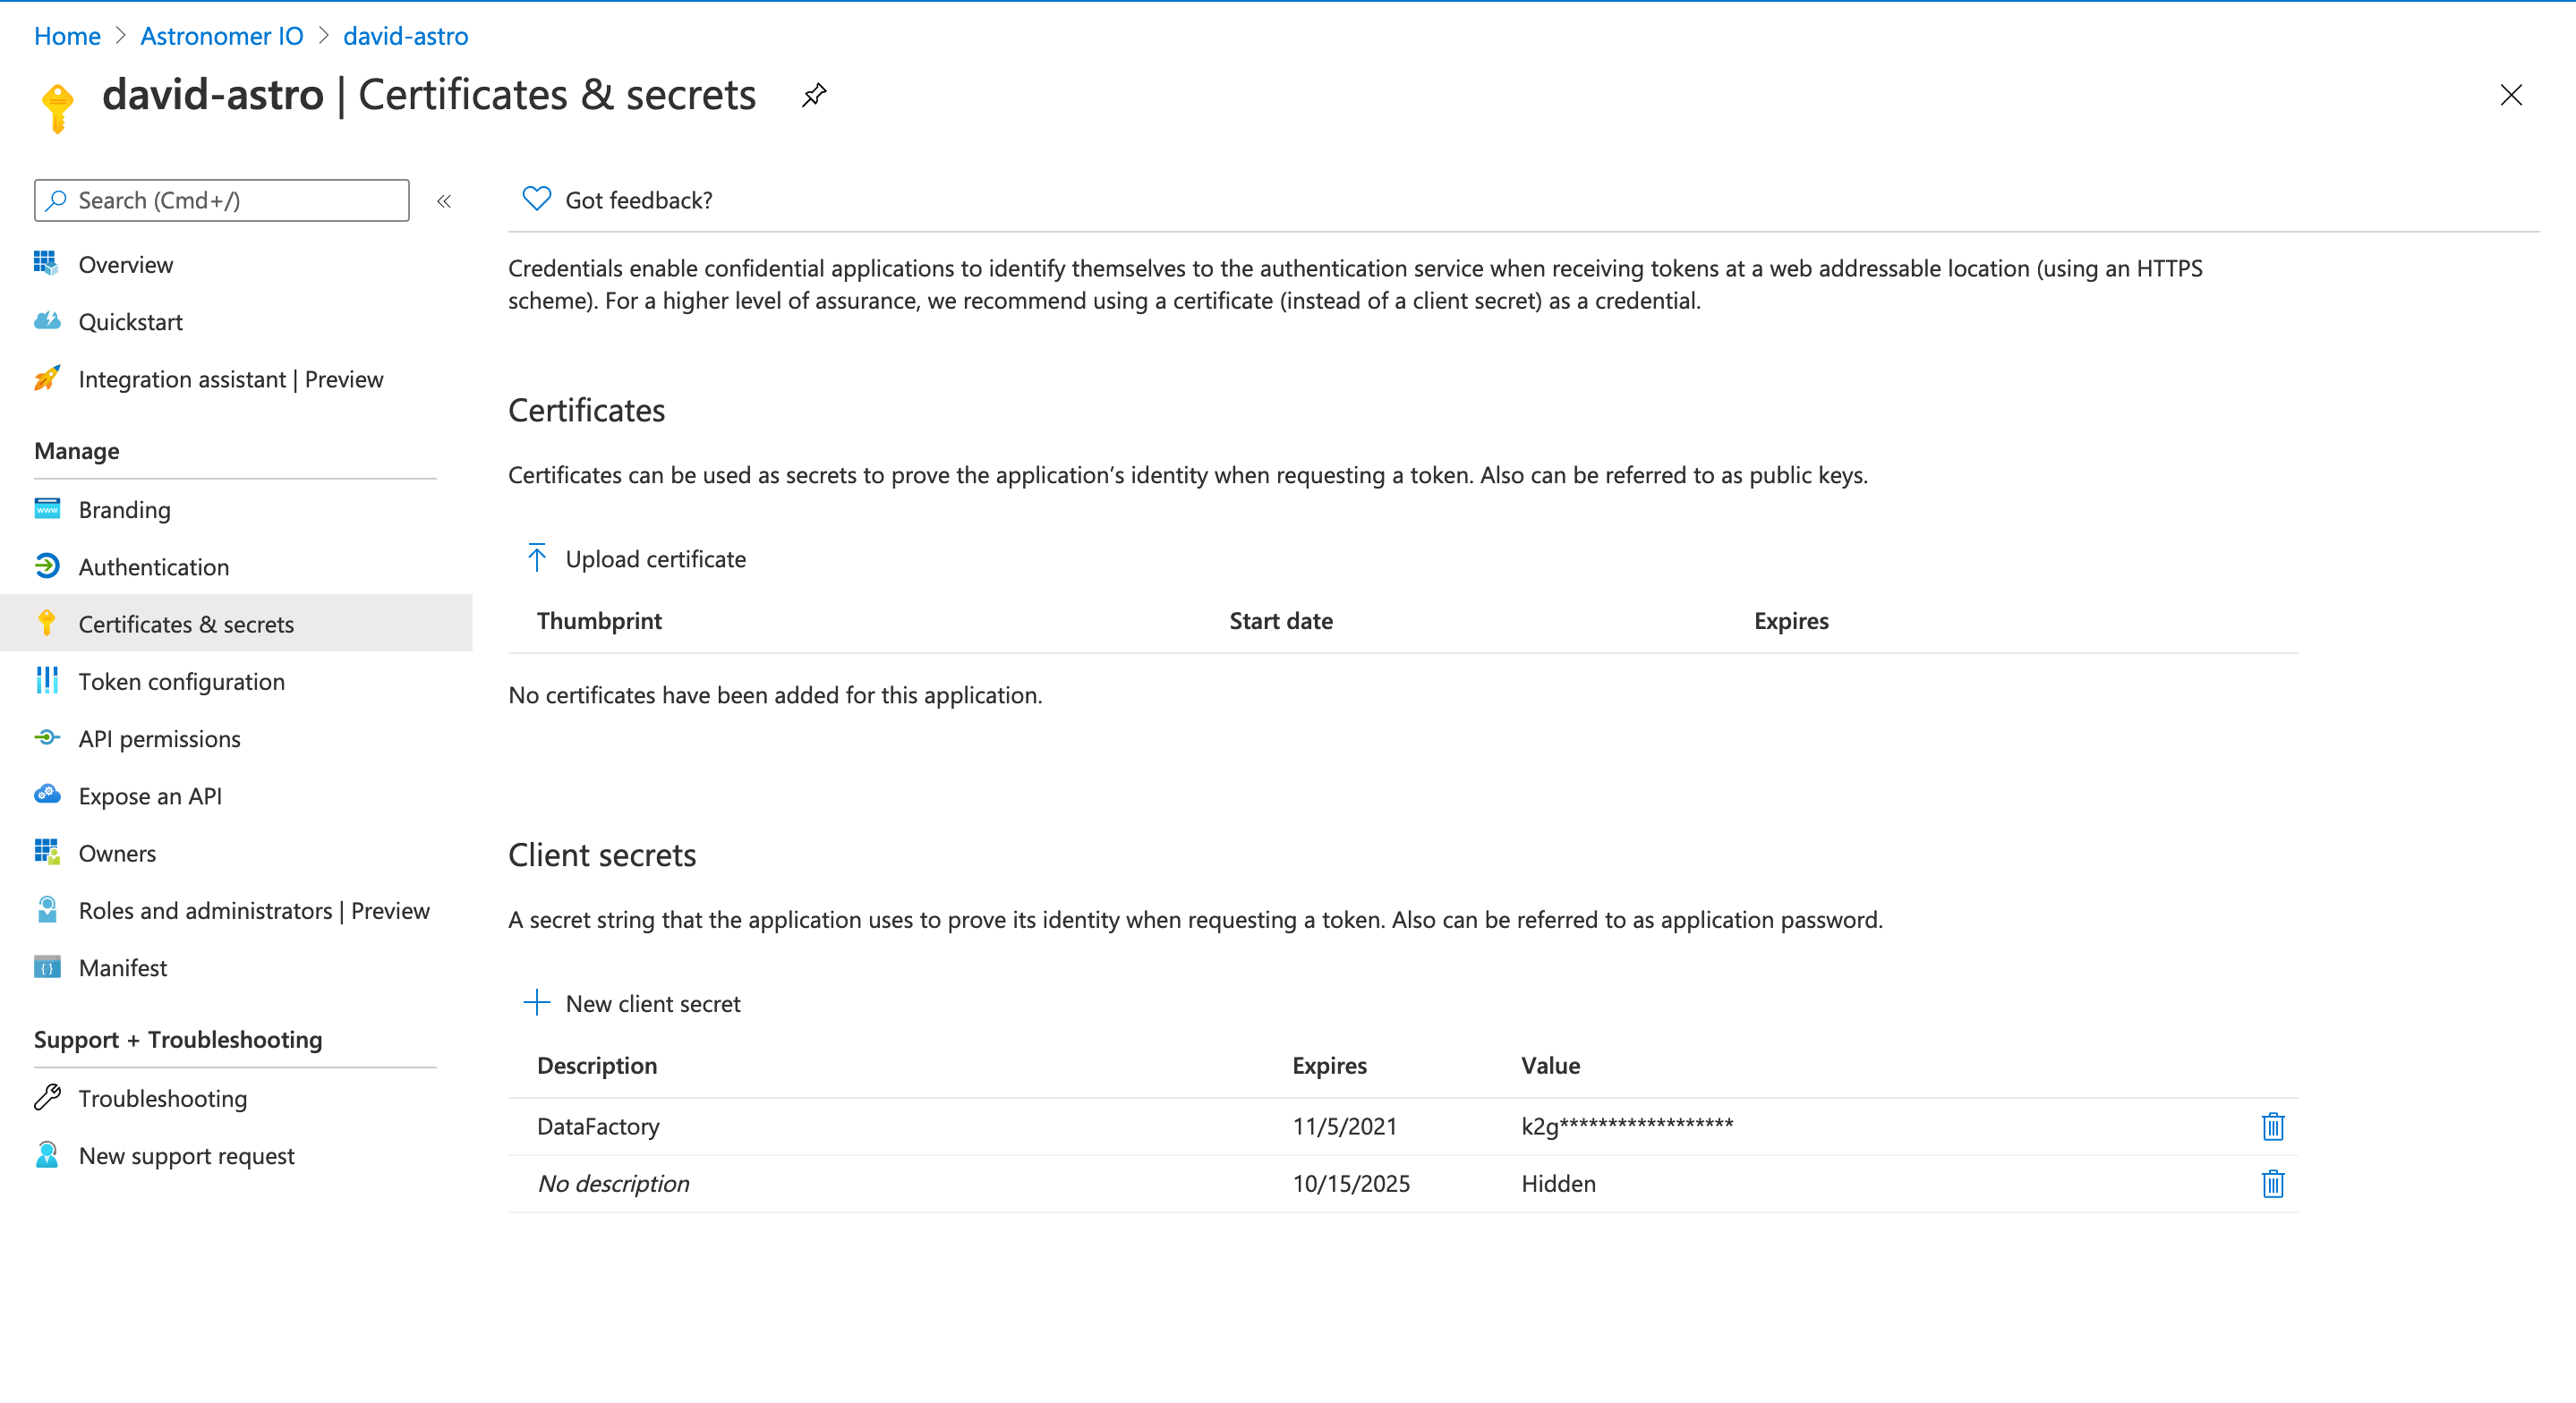
Click Certificates & Secretes to create a Client Secret for your application. Once there click New client secret to create a client secret which will be used to connect Data Factory in Airflow.
Once you have a Client ID and Secret you need to connect your API key to your Data Factory instance. To do this, go back to the overview of your Data Factory and click Access Control. Once there click Add role assignments to add your Application(API) as a contributor to the Data Factory.
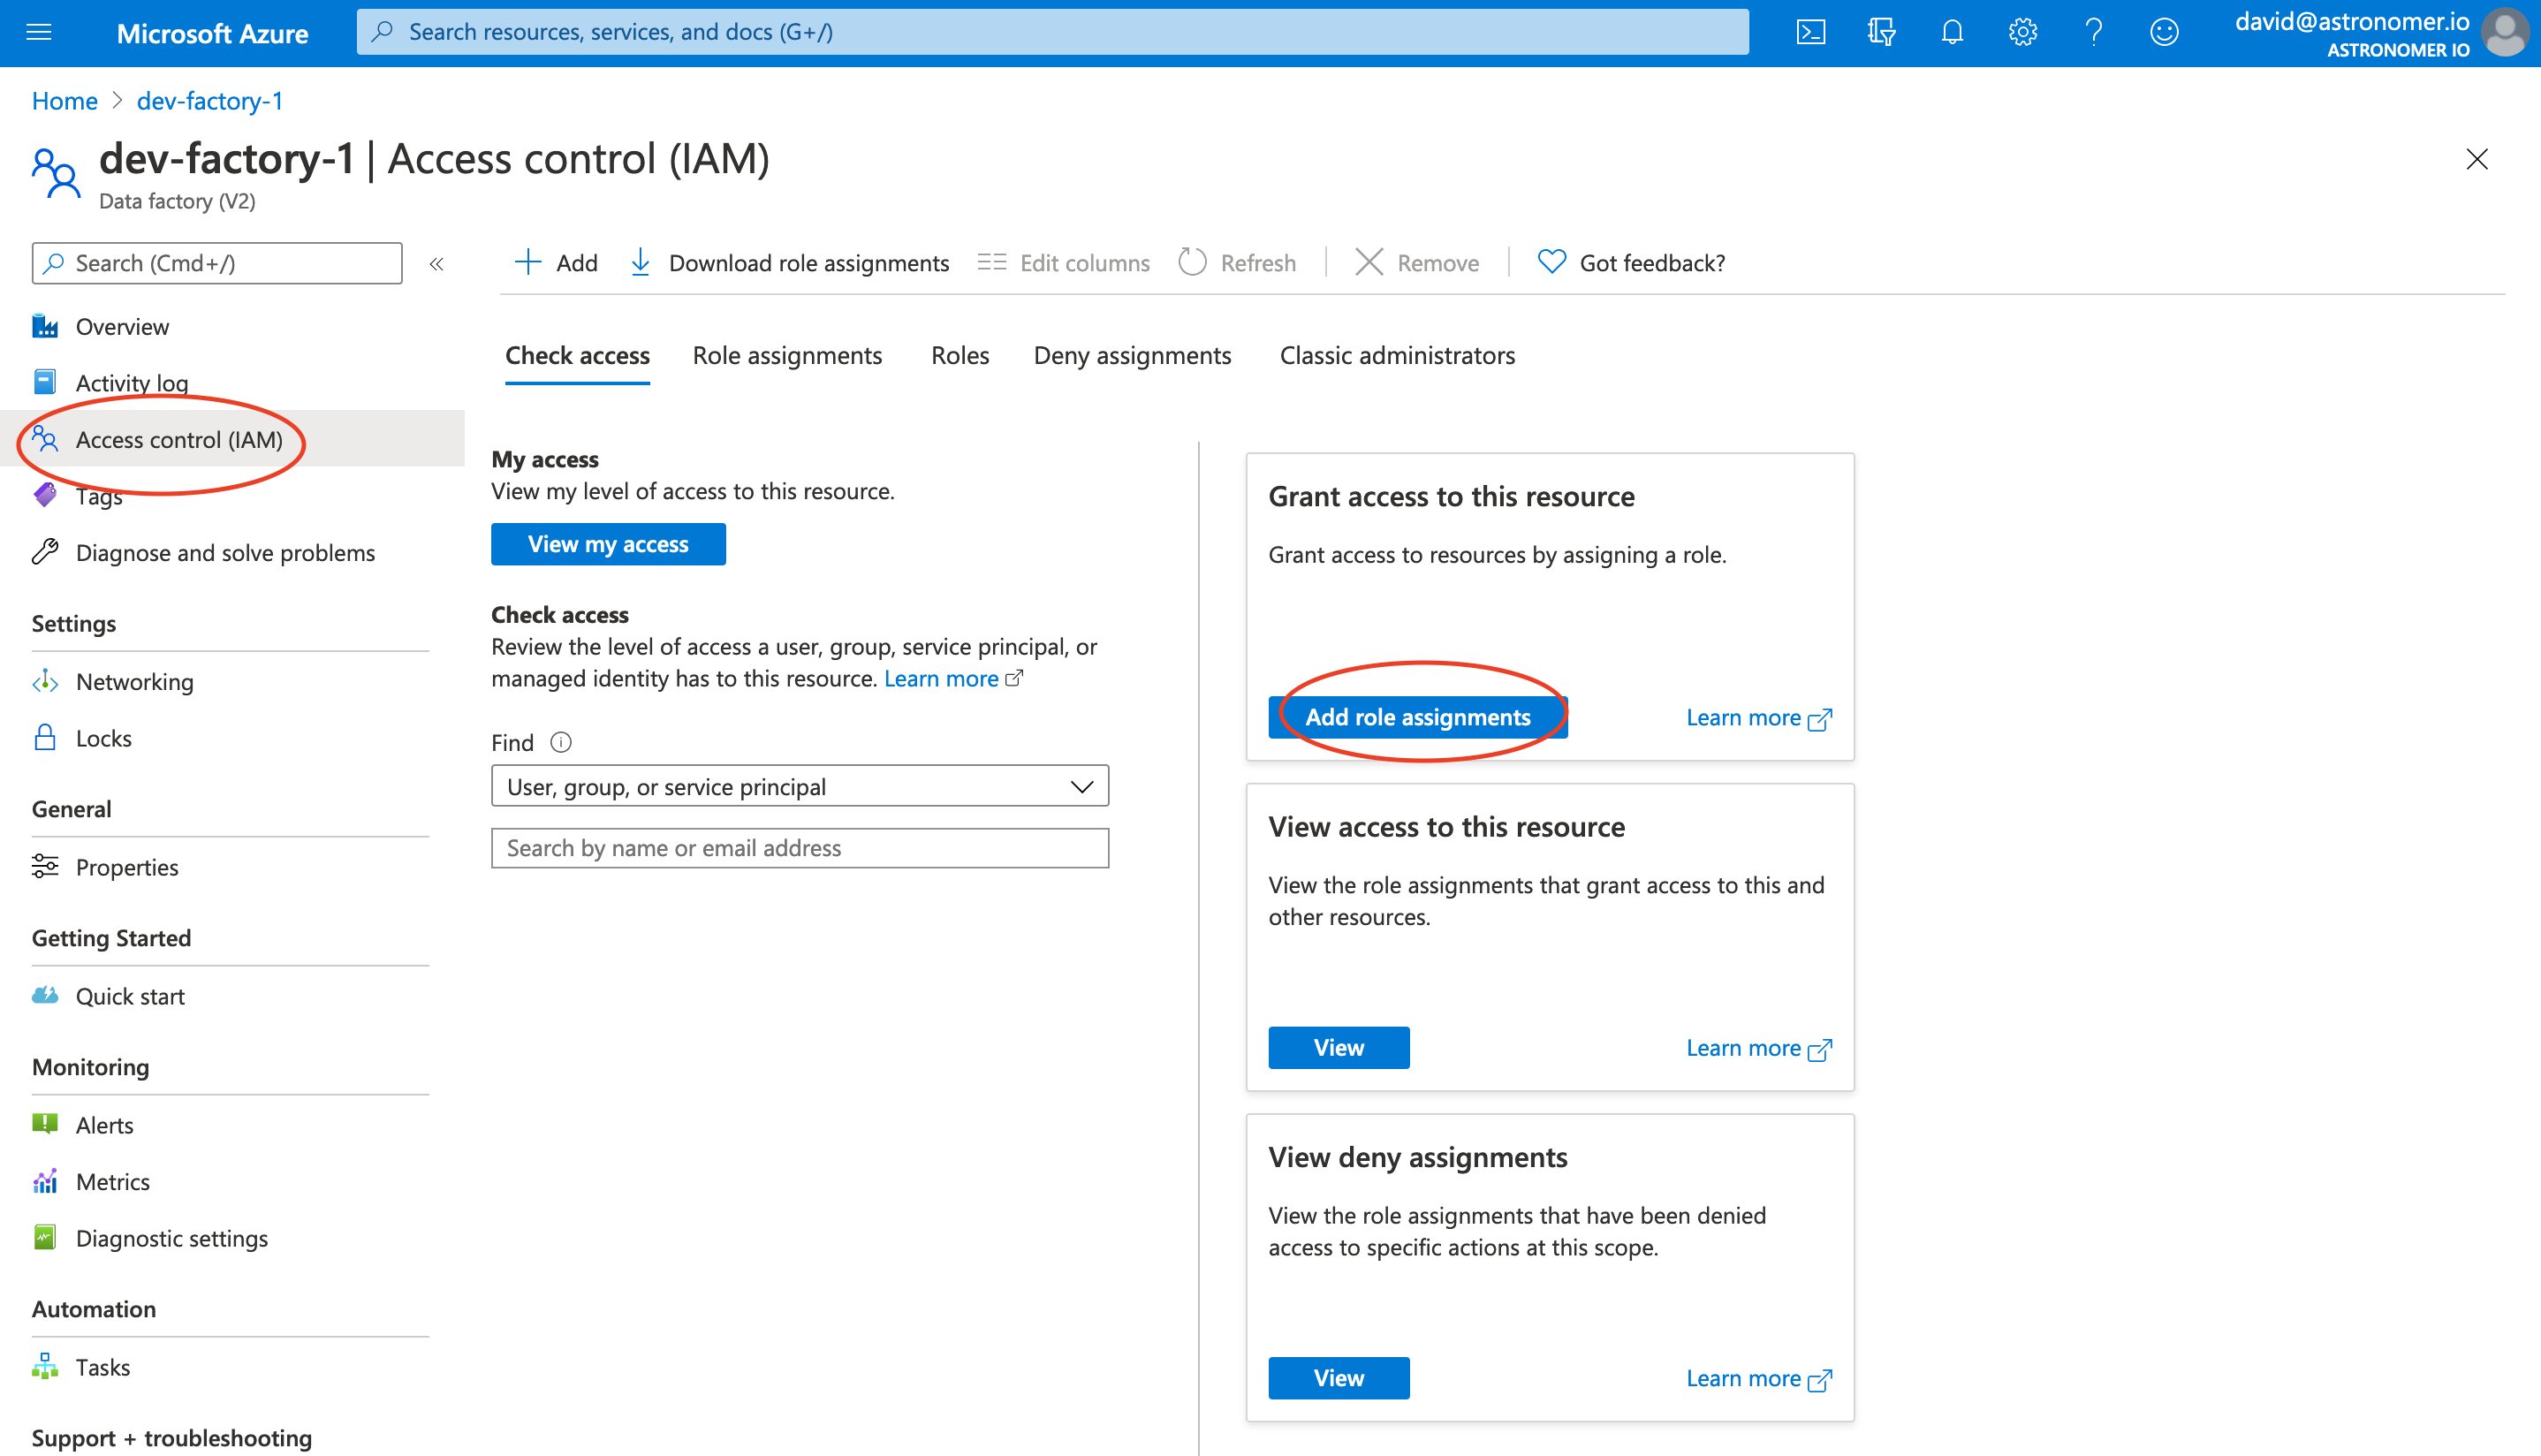
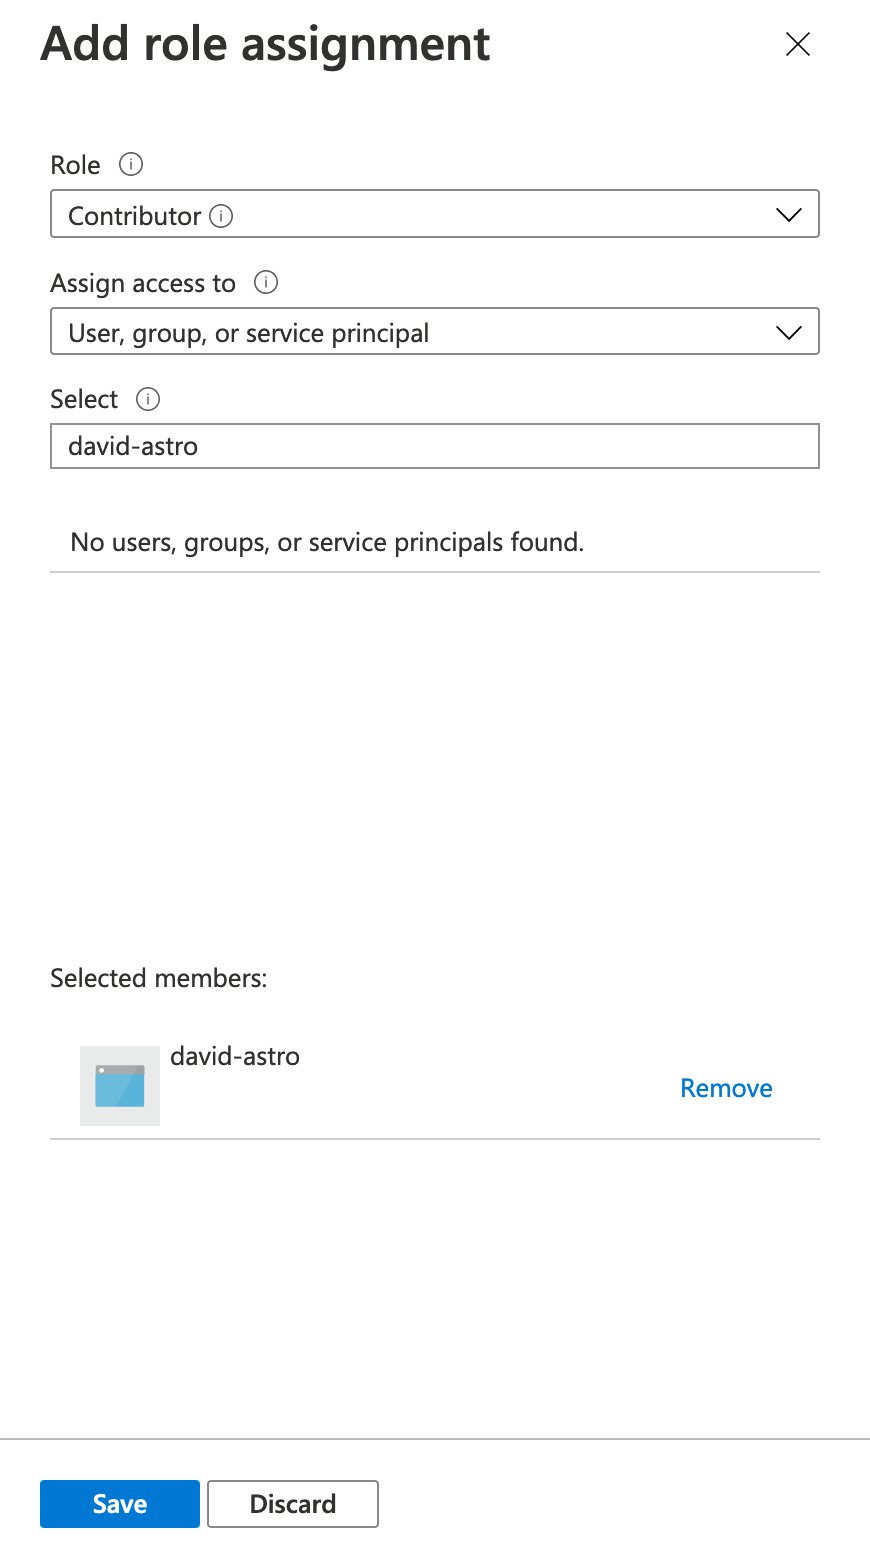
Next a screen asking you to add a role assignment appears. Add the following settings:
- Role: Contributor
- Assign access to: User, group, or service principal
Next search for your app (david-astro in this example), add it to 'Selected members' and click save.
Now you should be able to connect to your Data Factory from Airflow using your Client ID and Client Secret.
Additional detail on requirements for interacting with Azure Data Factory using the REST API can be found here. You can also see this link for more information on creating a registered application in Azure Active Directory
Create a DAG to orchestrate ADF jobs
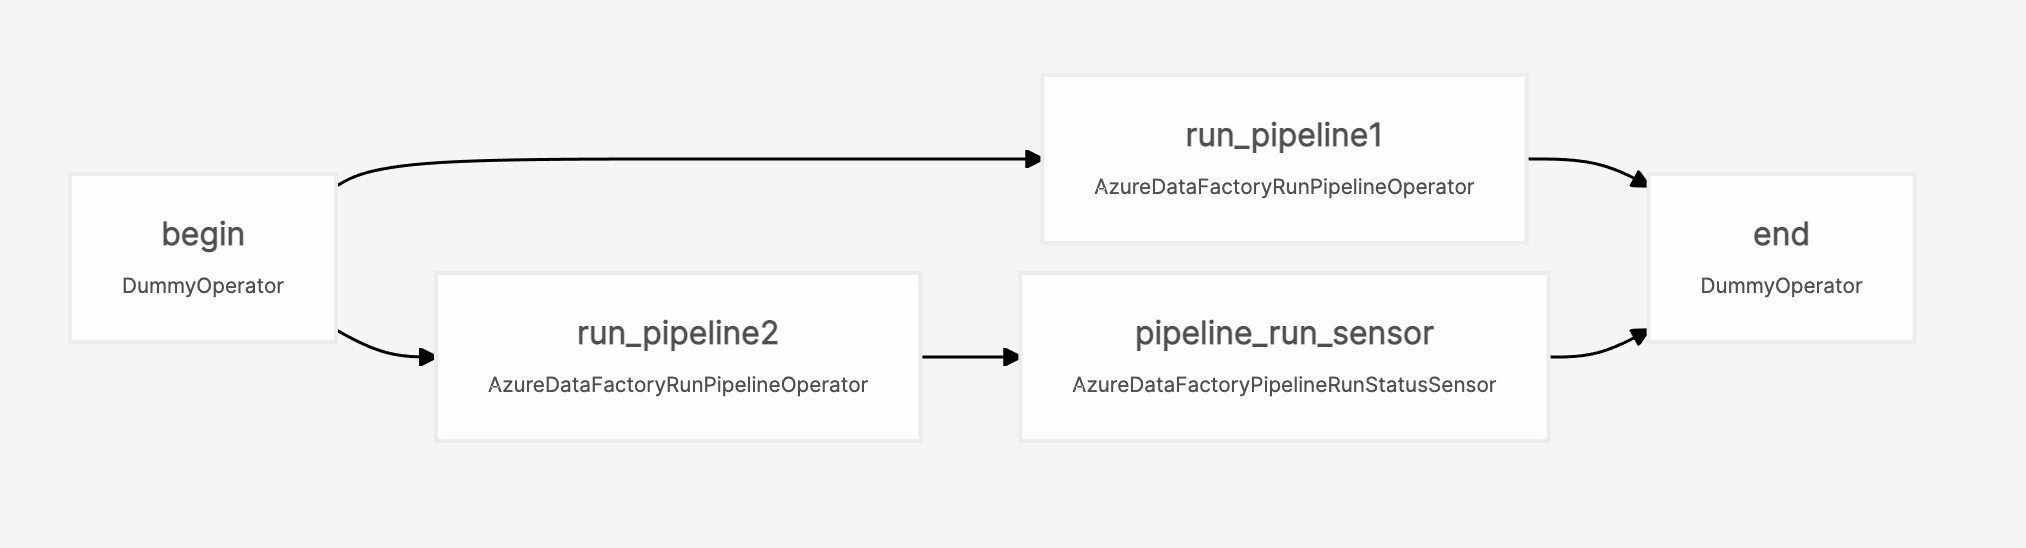
Now that our ADF pipelines are runnable, we create a DAG that executes those pipelines using Azure provider modules. The DAG below executes two ADF pipelines in parallel (tasks run_pipeline1 and run_pipeline2). It then uses an AzureDataFactoryPipelineRunStatusSensor to wait until pipeline2 has completed before finishing the DAG.
from datetime import datetime, timedelta

from airflow.models import DAG, BaseOperator
from airflow.operators.empty import EmptyOperator
from airflow.providers.microsoft.azure.operators.data_factory import AzureDataFactoryRunPipelineOperator
from airflow.providers.microsoft.azure.sensors.data_factory import AzureDataFactoryPipelineRunStatusSensor
from airflow.utils.edgemodifier import Label

with DAG(
    dag_id="example_adf_run_pipeline",
    start_date=datetime(2021, 8, 13),
    schedule_interval="@daily",
    catchup=False,
    default_args={
        "retries": 1,
        "retry_delay": timedelta(minutes=3),
        "azure_data_factory_conn_id": "azure_data_factory",
        "factory_name": "my-data-factory",  # This can also be specified in the ADF connection.
        "resource_group_name": "my-resource-group",  # This can also be specified in the ADF connection.
    },
    default_view="graph",
) as dag:
    begin = EmptyOperator(task_id="begin")
    end = EmptyOperator(task_id="end")

    # [START howto_operator_adf_run_pipeline]
    run_pipeline1: BaseOperator = AzureDataFactoryRunPipelineOperator(
        task_id="run_pipeline1",
        pipeline_name="pipeline1",
        parameters={"myParam": "value"},
    )
    # [END howto_operator_adf_run_pipeline]

    # [START howto_operator_adf_run_pipeline_async]
    run_pipeline2: BaseOperator = AzureDataFactoryRunPipelineOperator(
        task_id="run_pipeline2",
        pipeline_name="pipeline2",
        wait_for_termination=False,
    )

    pipeline_run_sensor: BaseOperator = AzureDataFactoryPipelineRunStatusSensor(
        task_id="pipeline_run_sensor",
        run_id=run_pipeline2.output["run_id"],
    )
    # [END howto_operator_adf_run_pipeline_async]

    begin >> Label("No async wait") >> run_pipeline1
    begin >> Label("Do async wait with sensor") >> run_pipeline2
    [run_pipeline1, pipeline_run_sensor] >> end
Note that this DAG requires an azure_data_factory Airflow connection. The connection requires the following information:
- Login: Your Azure Client ID
- Password: Your Azure Client secret
- Extras:
{"tenantId":"Your Tenant ID", "subscriptionId":"Your Subscription ID", "resourceGroup":"Your Resource Group", "factory":"Your Factory"}
For a more complex example of orchestrating dependent ADF pipelines with Airflow, see Orchestrating Multiple Azure Data Factory Pipelines in Airflow.