Get started with Apache Airflow, Part 2: Providers, connections, and variables
Learn core Apache Airflow concepts in this hands-on tutorial using the Astro CLI.
Use this tutorial after completing the Get started with Apache Airflow tutorial to learn about how to connect Airflow to external systems.
After you complete this tutorial, you'll be able to:
- Add a provider to your Airflow environment.
- Create and use an Airflow connection.
- Create and use an Airflow variable.
- Use the
GithubTagSensorto wait for a tag to be added to a GitHub repository. - Use the
SimpleHTTPOperatorto query an API.
Time to complete
This tutorial takes approximately 1 hour to complete.
Assumed knowledge
To complete this tutorial, you'll need to know:
- How to write DAGs and run Airflow. See Get started with Apache Airflow.
- The basics of git. See the tutorial on Git’s official webpage.
Prerequisites
- A GitHub account with a personal access token and at least one repository. If you don’t have a GitHub repository you can follow the steps in the GitHub documentation on how to create one.
If you do not have a GitHub account, you can create one for free on the GitHub website. To create a personal access token, see the official GitHub documentation.
Step 1: Create your Astro project
To run data pipelines on Astro, you first need to create an Astro project, which contains the set of files necessary to run Airflow locally. For more information on the Astro project, see Part 1 of the Get started with Apache Airflow tutorial.
Create a new directory for your Astro project:
mkdir <your-astro-project-name>Open the directory:
cd <your-astro-project-name>Run the following Astro CLI command to initialize an Astro project in the directory:
astro dev initRun the following Astro CLI command to start Airflow:
astro dev startOnce your local environment is ready, the CLI automatically opens a new tab or window in your default web browser to the Airflow UI at
https://localhost:8080.Log in to the Airflow UI with
adminfor both your username and password.
Step 2: Create your DAG
- Create a new Python file in the
/dagsdirectory of your Astro project calledmy_second_dag.py. - Copy the code from the < > Code tab of the Tutorial DAG: Airflow Connections from the Astronomer Registry.
- Paste the code into
my_second_dag.py.
Step 3: Add a provider package
Open the Airflow UI to confirm that your DAG was pushed to your environment. On the DAGs page, you should see a "DAG Import Error" like the one shown here:

Provider packages are Python packages maintained separately from core Airflow that contain hooks and operators for interacting with external services. You can browse all available providers in the Astronomer Registry.
Your DAG uses operators from two Airflow provider packages: the HTTP provider and the GitHub provider. While the HTTP provider is pre-installed in the Astro Runtime image, the GitHub provider is not, which causes the DAG import error.
Open the GitHub provider page in the Astronomer Registry.
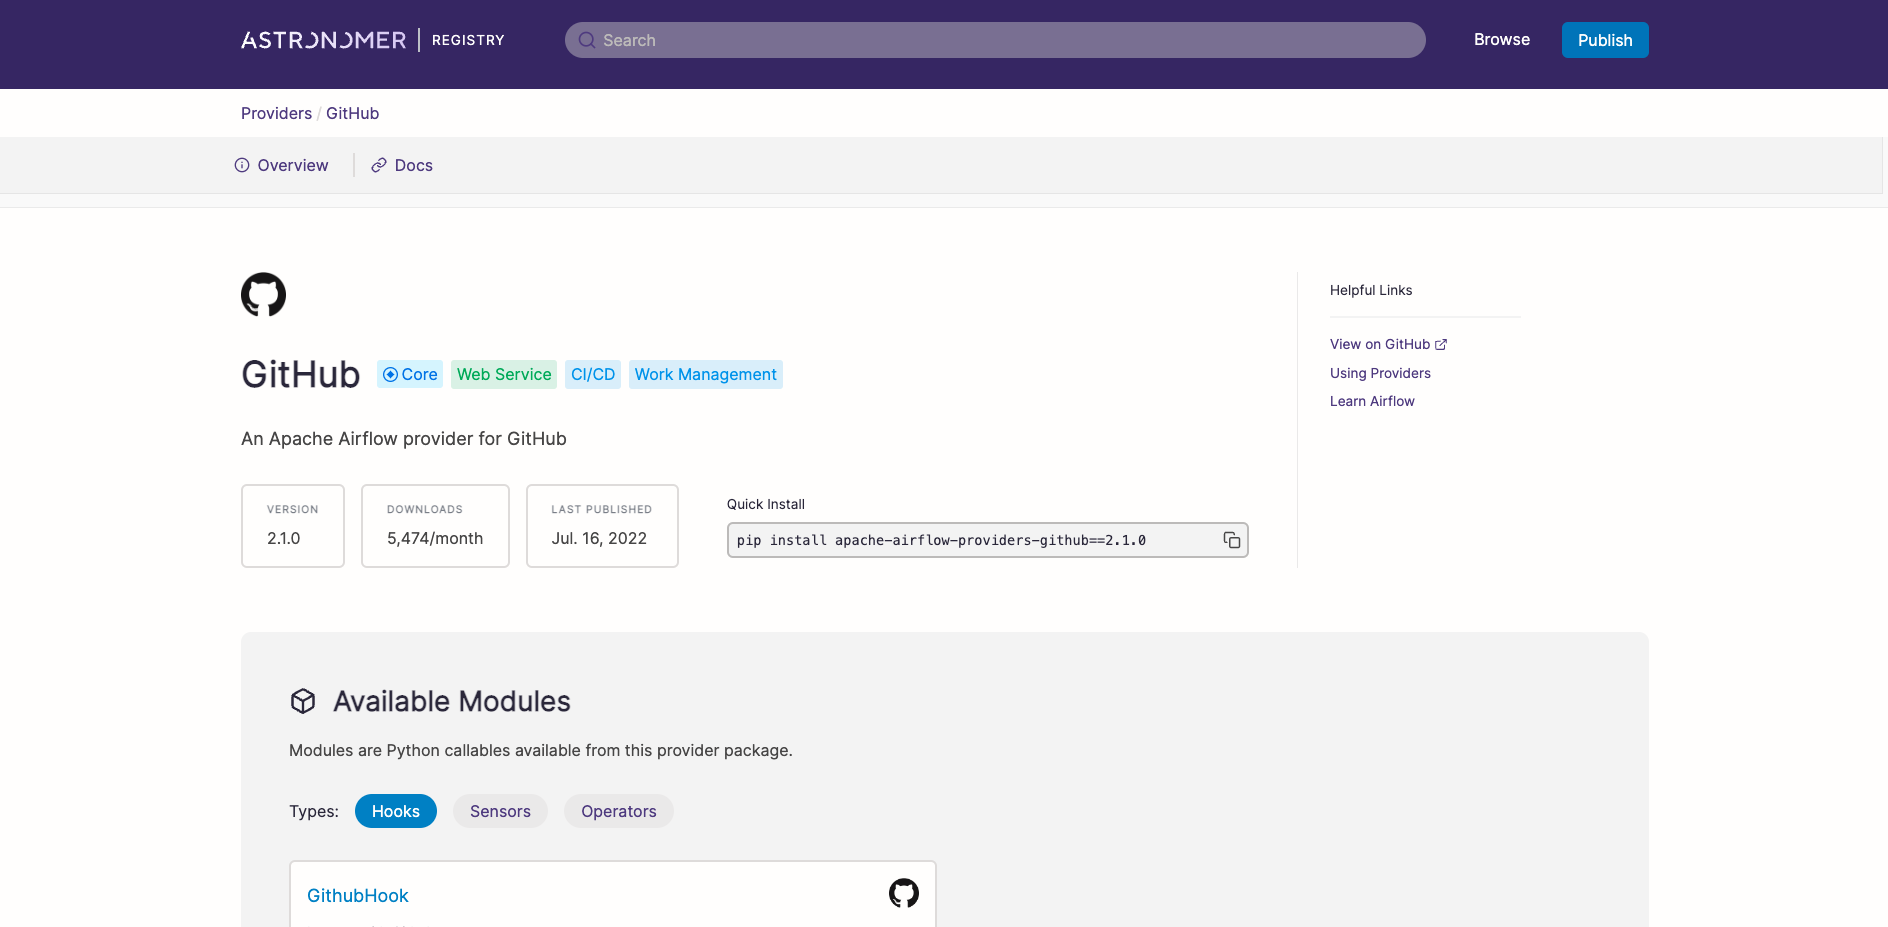
Copy the provider name and version from Quick Install.
Paste the provider name and version into the
requirements.txtfile of your Astro project. Make sure to only addapache-airflow-providers-github=<version>withoutpip install.Restart your Airflow environment by running
astro dev restart. Unlike DAG code changes, package dependency changes require a complete restart of Airflow.
Step 4: Add an Airflow variable
After restarting your Airflow instance, you should not see the same DAG import error from Step 2. However, you should see a new DAG import error about a missing Airflow variable. Airflow variables are key value pairs that can be accessed from any DAG in your Airflow environment. You'll now define the missing Airflow variable in the Airflow UI:
Go to Admin > Variables to open the list of Airflow variables. It will be empty.
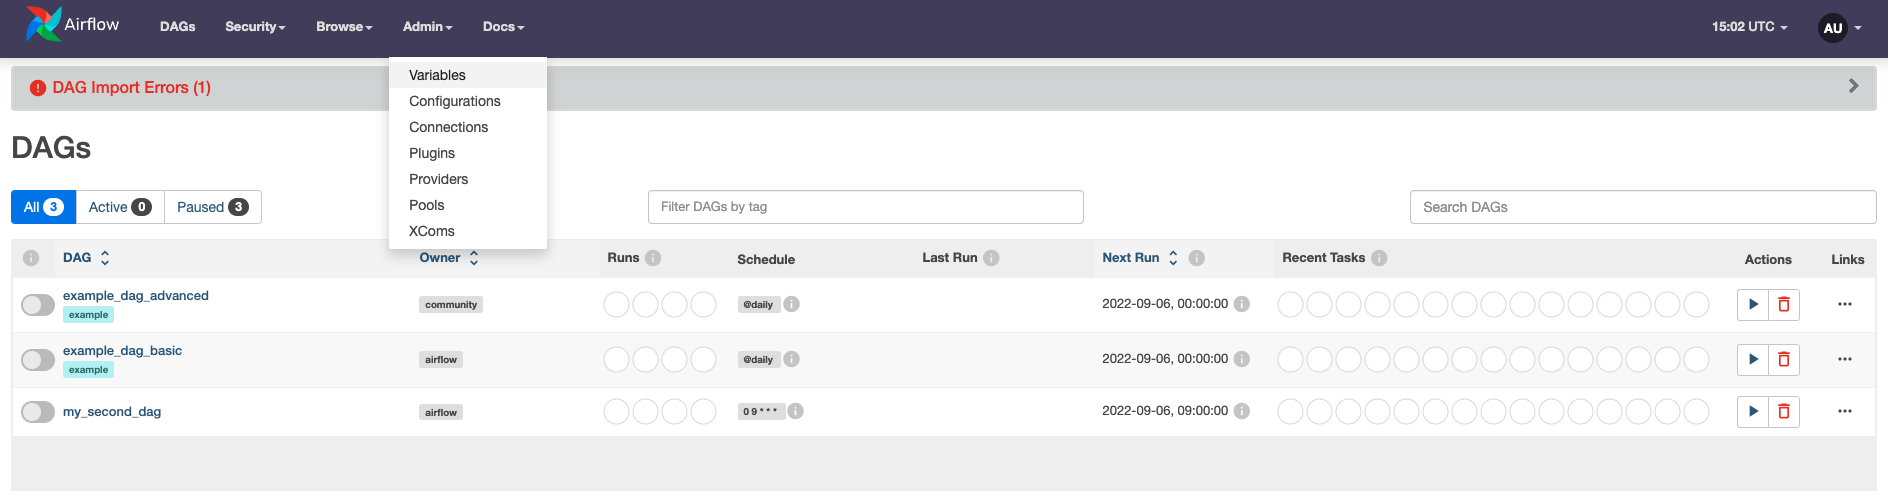
Click on the + sign to open the form for adding a new variable. Set the Key for the variable as
my_github_repoand set the Val as a GitHub repository you have administrator access to. Make sure the Val is in the formatgithub_account_name/repository_name(for exampleapache/airflow). The repository can be private.Click Save.
Go back to the DAGs view. You should now see your DAG without any import errors.
Step 5: Create a GitHub connection
An Airflow connection is a set of configurations for connecting with an external tool in the data ecosystem. If you use a hook or operator that connects to an external system, it likely needs a connection.
In your example DAG, you used two operators that interact with two external systems, which means you need to define two different connections.
In the Airflow UI, go to Admin > Connections.
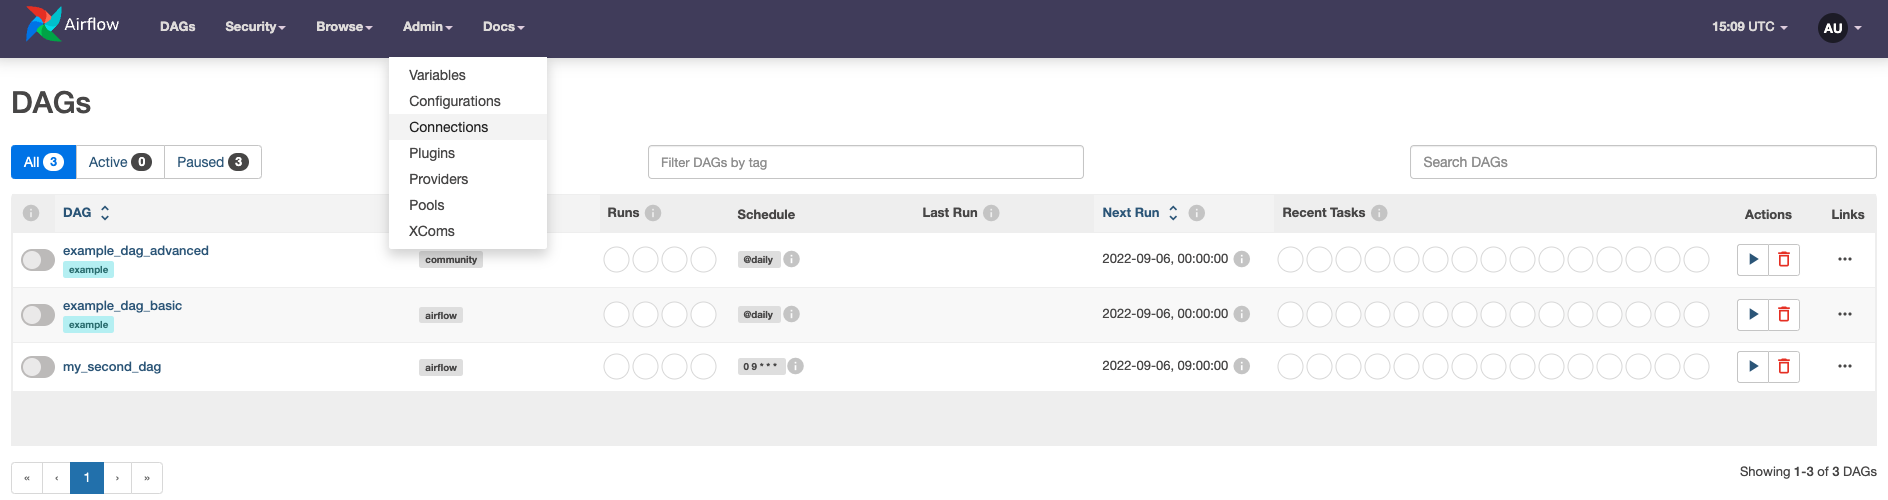
Click + to open the form for adding a new Airflow connection.
Name the connection
my_github_connectionand set its Connection Type toGitHub. Note that you can only select connection types that are available from either core Airflow or an installed provider package. If you are missing the connection typeGitHub, double check that you installed theGitHubprovider correctly in Step 3.Enter your GitHub Access Token in the GitHub Access Token field. If you need to create a token, you can follow the official GitHub documentation.
Test your connection by clicking Test. You should see a green banner indicating that your connection was successfully tested.
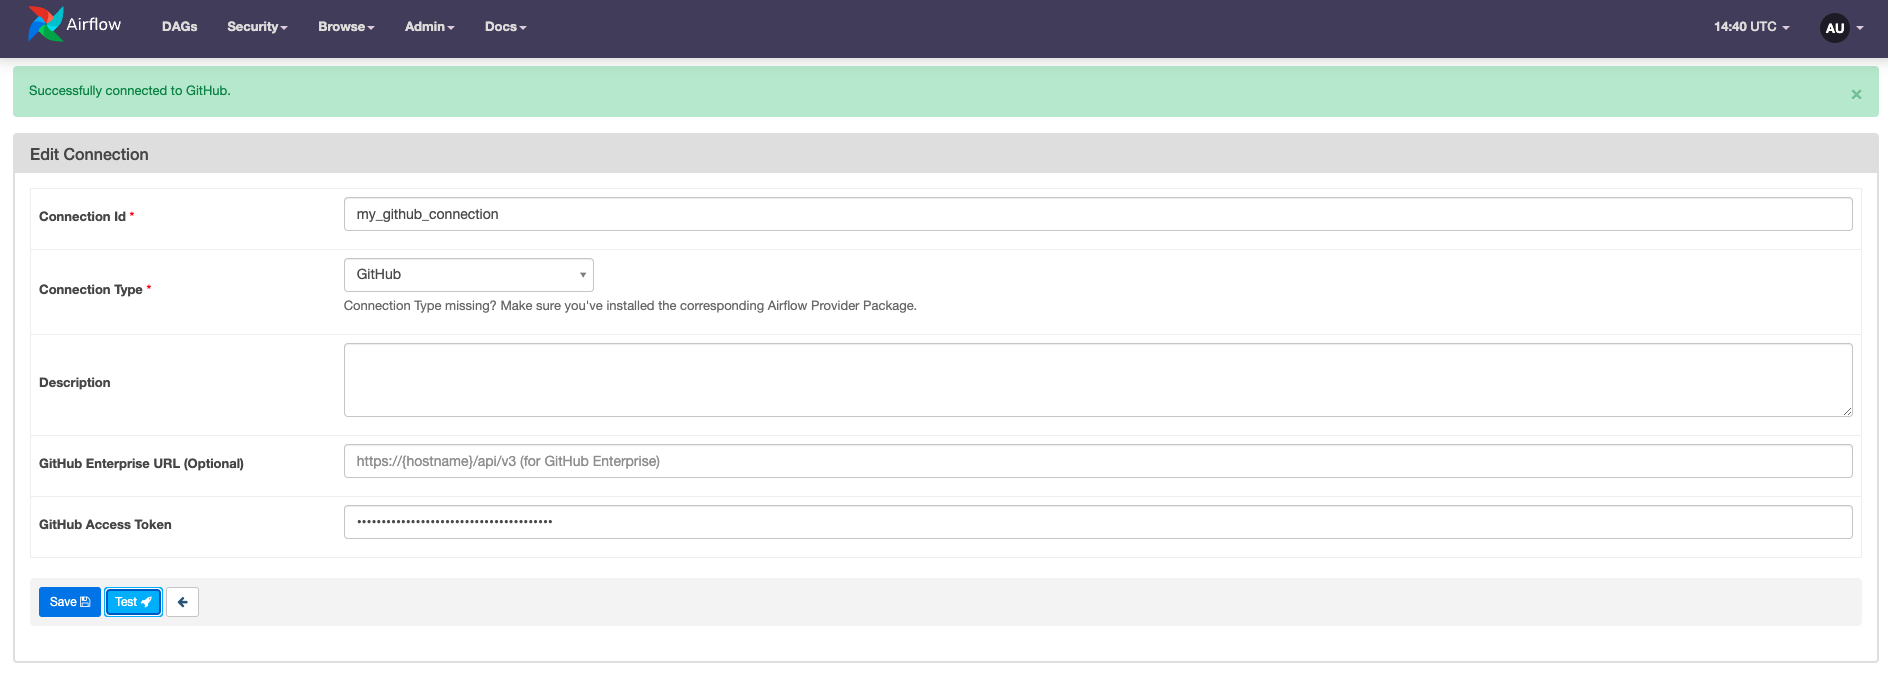
Note that the option to test connections was added in Airflow 2.2. If you are running an older version of Airflow, you can skip this step.
- Save the connection by clicking the
Savebutton.
Step 6: Create an HTTP connection
In the Connections view, click + to create a new connection.
Name the connection
my_http_connectionand select a Connection Type ofHTTP.Enter the host URL for the API you want to query in the Host field. For this tutorial we use the Catfact API, which returns a random fact about cats for every
GETrequest. The host for this API ishttp://catfact.ninja/fact.Test your connection by pressing the Test button.
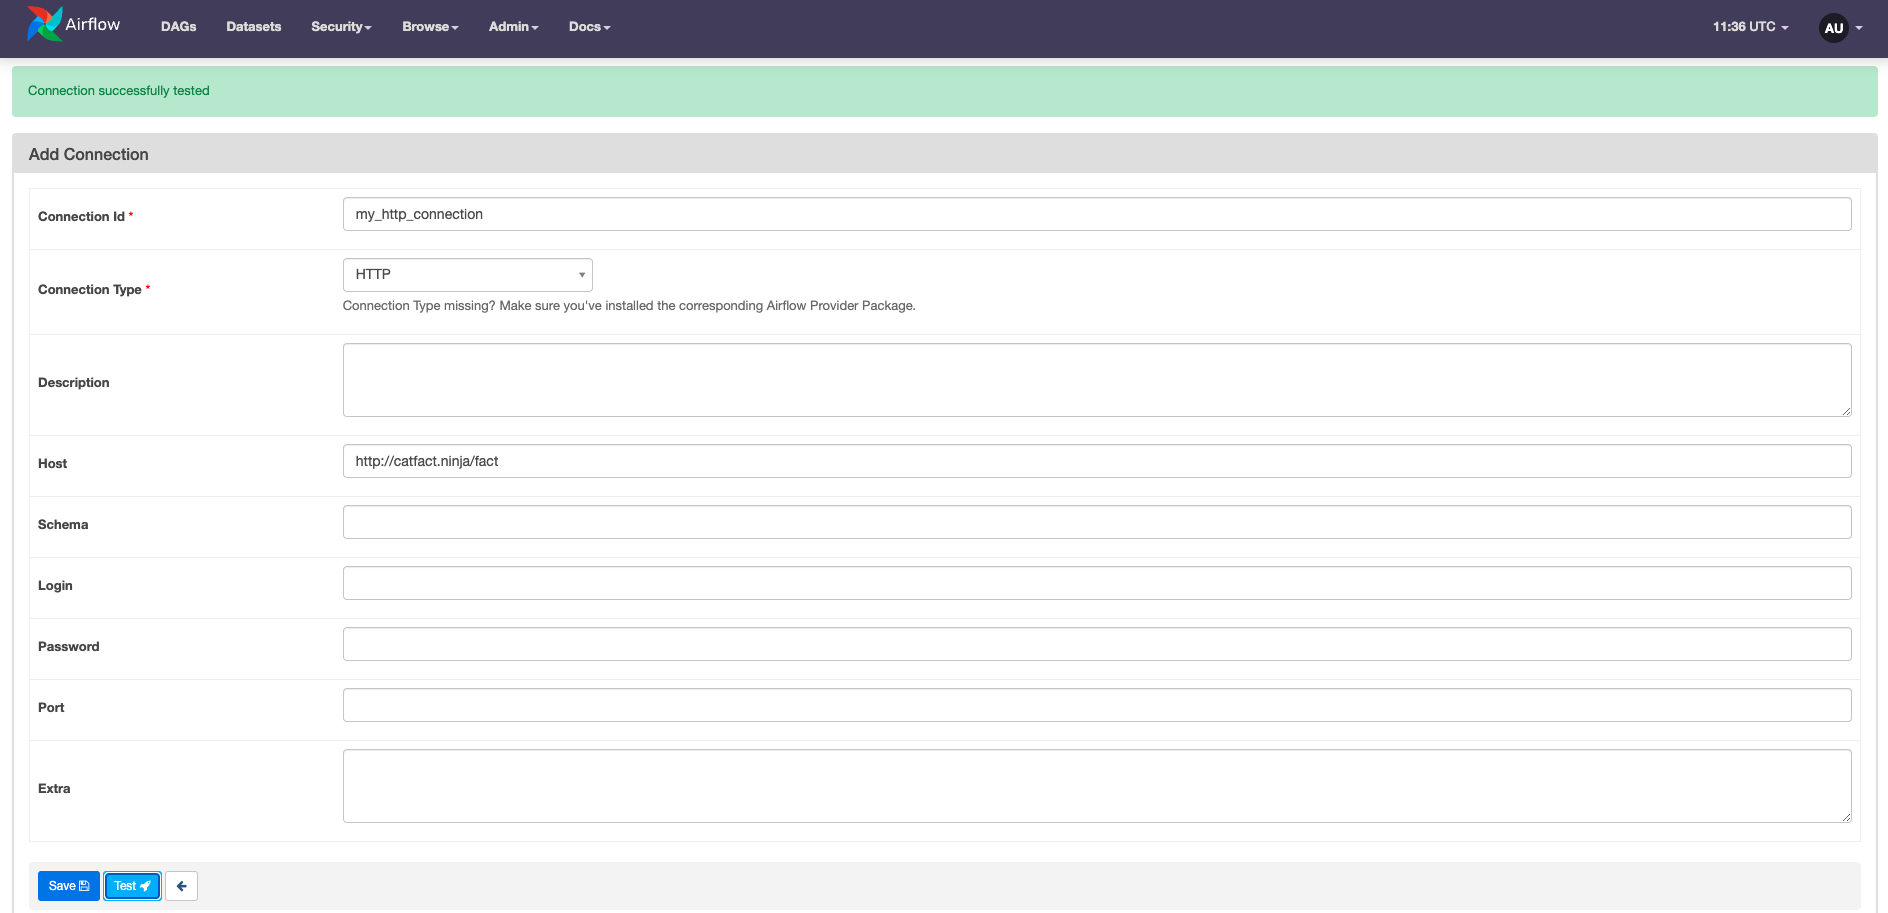
Click Save.
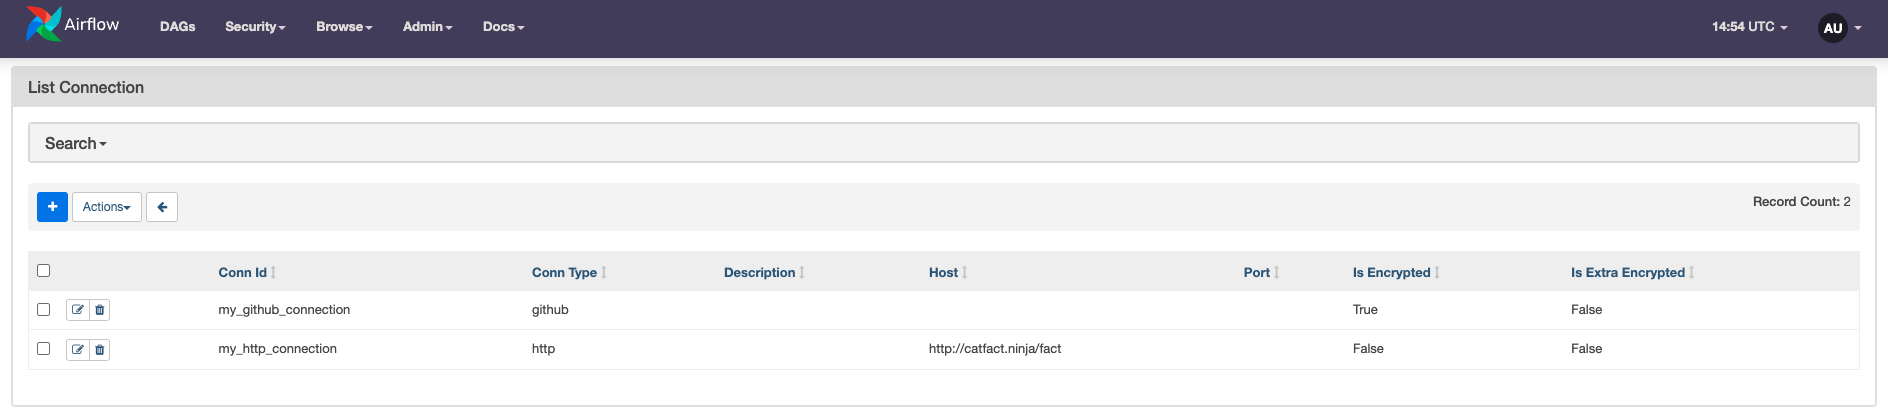
You should now have two connections as shown in the following screenshot:
Step 7: Test your DAG
Go to the Airflow UI and unpause the DAG by clicking on the toggle to the left of the DAG name. The last scheduled DAG run automatically starts, and the
tag_sensorstarts waiting for thev1.0tag to be added to your GitHub repository. You will see two light green circles in the DAGs view which indicates that the DAG run is in progress and theexample_tag_sensortask is running.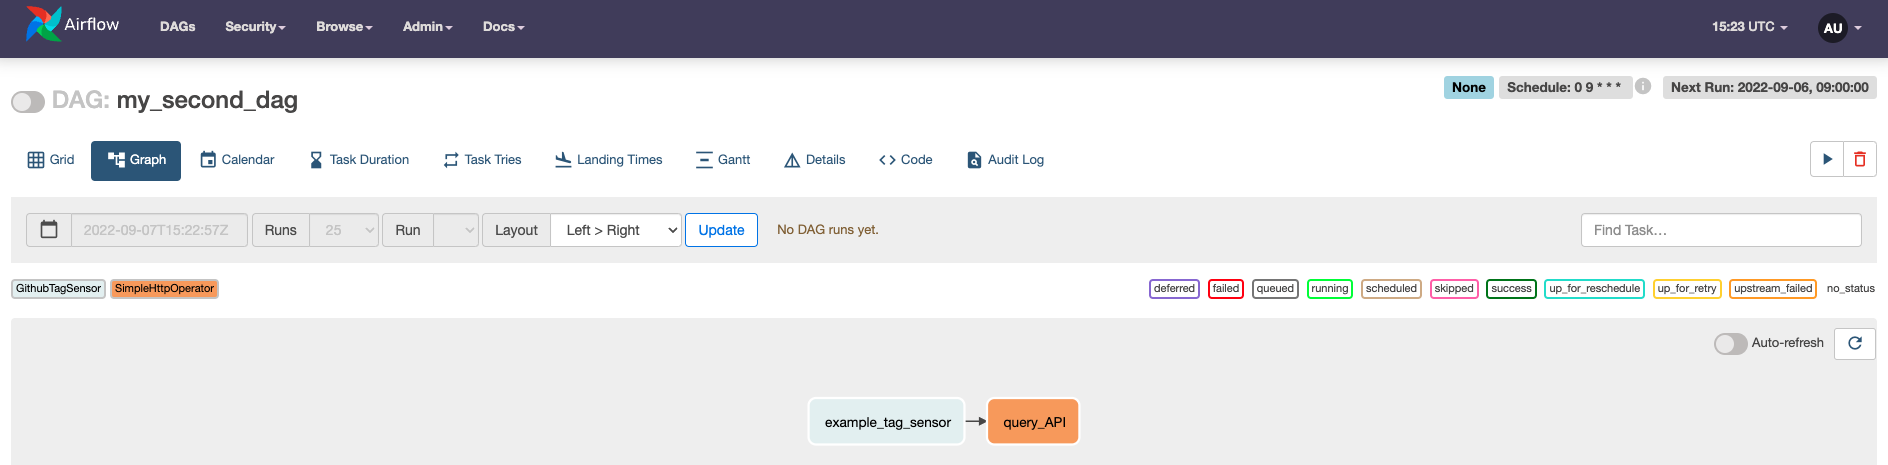
Add the tag
v1.0to your GitHub repository by configuring it in the GitHub UI or runninggit tag v1.0 && git push --tagsin your local repository clone.Watch for the
example_tag_sensortask to finish successfully. Thequery_apitask should now start.In the Grid view, click on the green box representing the successful task run for
query_api. Check the Log page of the task for a brand new cat fact!
[2022-09-07, 16:34:04 UTC] {base.py:68} INFO - Using connection ID 'my_http_connection' for task execution.
[2022-09-07, 16:34:04 UTC] {http.py:148} INFO - Sending 'GET' to url: http://catfact.ninja/fact
[2022-09-07, 16:34:05 UTC] {http.py:125} INFO - {"fact":"Cats sleep 16 to 18 hours per day. When cats are asleep, they are still alert to incoming stimuli. If you poke the tail of a sleeping cat, it will respond accordingly.","length":167}
Step 8: View your DAG code
Now that your Airflow environment is configured correctly, look at the DAG code you copied from the repository to see how your new configurations are used at the code level.
At the top of the file, all necessary packages are imported. Notice how both the SimpleHttpOperator as well as the GithubTagSensor are part of the provider packages you installed.
from airflow import DAG
from airflow.models import Variable
from airflow.providers.http.operators.http import SimpleHttpOperator
from airflow.providers.github.sensors.github import GithubTagSensor
from datetime import datetime
Next, the DAG context is instantiated using the DAG class. The DAG has the ID my_second_dag, and it starts running on September 1st, 2022. After its start date, the DAG runs every day at 9:00 AM as defined in a cron statement. catchup is set to False in order to prevent the DAG runs from between the start_date and today from being scheduled automatically.
with DAG(
    dag_id="my_second_dag",
    start_date=datetime(2022, 9, 1),
    schedule="0 9 * * *",
    catchup=False
):
The DAG itself has two tasks. The first task uses the GithubTagSensor to check whether a tag named v1.0 has been added to your GitHub repository. It utilizes the Airflow variable (my_github_repo) and connection (my_github_connection) to access the correct repository with the appropriate credentials. The sensor checks for the tag every 30 seconds and will time out after one day. It is best practice to always set a timeout because the default value is quite long at 7 days, which can impact performance if left unchanged in DAGs that run on a higher frequency.
    tag_sensor = GithubTagSensor(
        task_id='tag_sensor',
        github_conn_id="my_github_connection",
        tag_name='v1.0',
        repository_name=Variable.get("my_github_repo"),
        timeout=60*60*24,
        poke_interval=30
    )
The second task uses the SimpleHttpOperator to send a GET request to the cat fact API. The response is logged to the Airflow task logs using log_response=True.
    query_API = SimpleHttpOperator(
        task_id="query_API",
        http_conn_id="my_http_connection",
        method="GET",
        log_response=True
    )
Lastly, the dependency between the two tasks is set so that the API is only queried after the tag_sensor task is successful.
tag_sensor >> query_API
Conclusion
Congratulations on finishing this tutorial! You now know how to:
- Browse the Astronomer Registry for providers.
- Add a provider to your Airflow environment.
- Configure Airflow connections.
- Add Airflow variables.
- Use the
GithubTagSensorand theSimpleHTTPOperator. - Get a near infinite supply of cat facts.